Buttons and Ports
Button and port functions on your CS Air tester are described below.

| Feature | Description |
|---|---|
|
Status |
Red: tester off, USB-C power adapter connected Green: tester on, screen off (with or without power adapter) Rate of blinking LED (red or green) shows % battery charge:
|
|
USB Type-A Ports (2) |
Connects to any USB device. (FAT32-formatted device required only for manual software updates.) |
|
USB Type-C |
Connects to a USB Type-C connector for file transfer and to charge unit with the included AC adapter |
|
Volume Buttons |
Increase or decrease the audio volume for external Bluetooth or USB speakers or headsets |
|
Power Button |
Press and hold to display menu for Power off or Restart |
See Test and Management Ports for detailed explanations of the port functions.
See Updating Software for requirements on updating system software.
Refer to the product Specifications if needed.
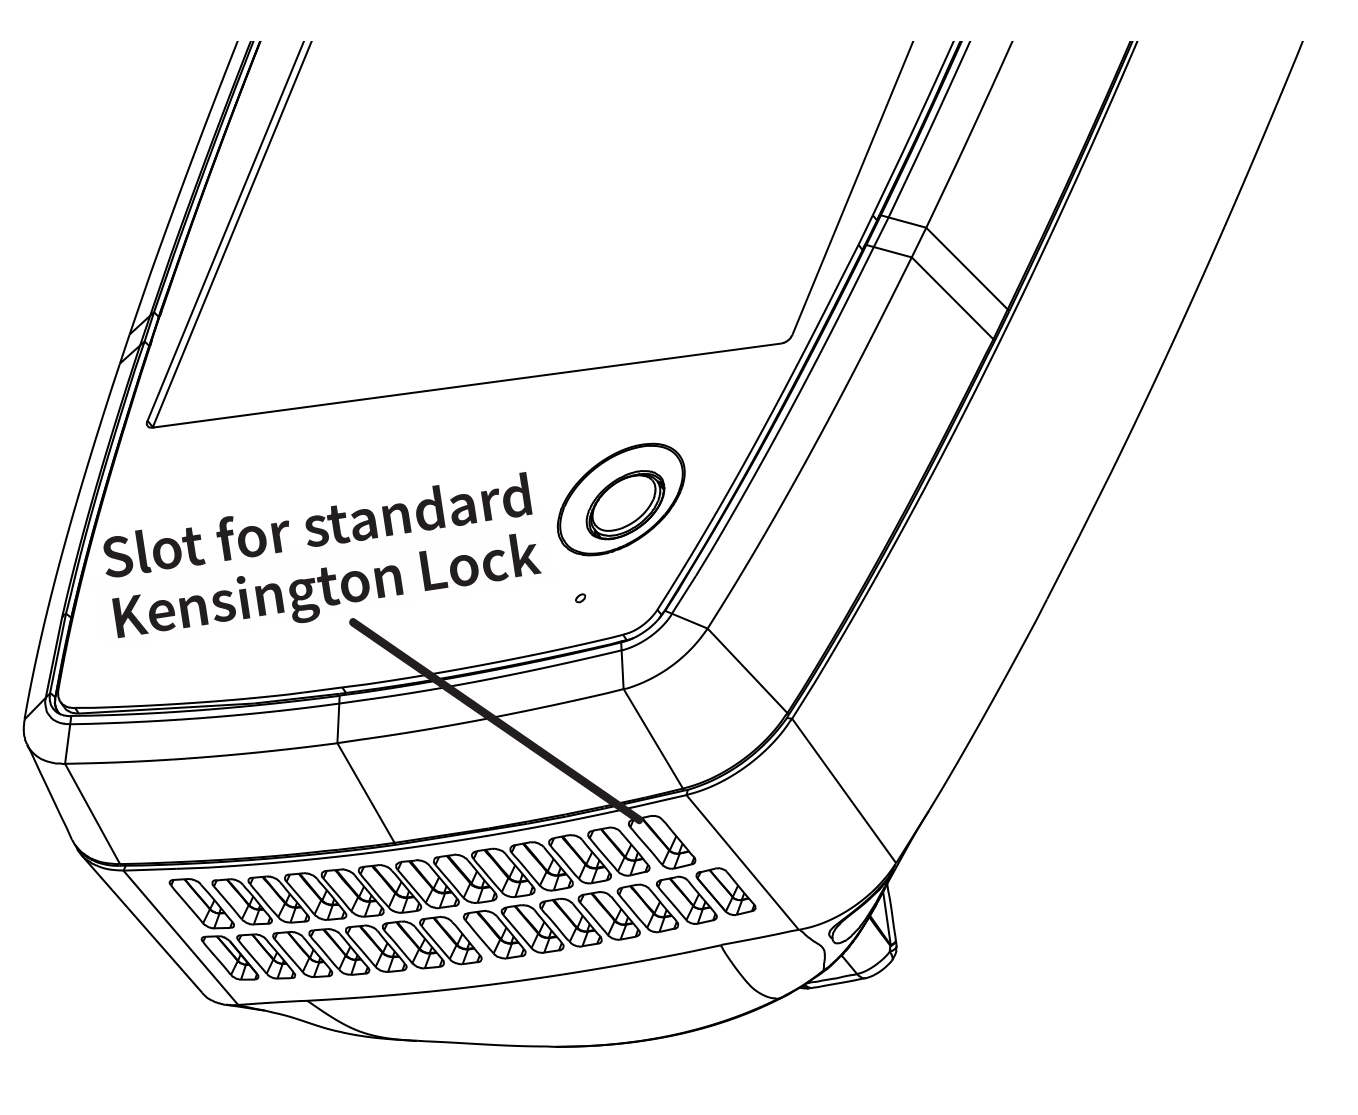
Using a Kensington Lock
The slot for a standard Kensington lock is the right front vent hole on the bottom of the tester, as shown below.
The back panel of the unit has two rows of six vent slots on either side of the serial number label. You can use a standard Kensington lock with any slot in these two rows.