Install and Start-Up
Obtaining Software and Keyfile
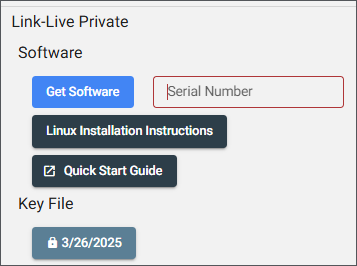
Follow the instructions from you NetAlly Order Fulfillment Acknowledgement to download the Link-Live Private Software and Keyfile.
To summarize the process:
-
Go to the public Link-Live.com and create an account.
-
In the left-side menu, navigate to Support > Software Downloads, and scroll down to Link-Live Private.
-
Enter your Serial Number to download both the Software and Keyfile. Both files are used to install your Private Instance of Link-Live.
Extracting Files
For this example, we refer to link_live_private.tar.gz as the file provided. However, the name of the tar.gz file is different for each customer.
-
In the terminal, run the command
tar -xvzf link_live_private.tar.gzto extract thetar.gzfile provided and place the contents into a dedicated directory. CAUTION! The directory name will be used for persistent data volumes. Do not rename it later.
The extracted folder should contain the following:
nginx/docker-images/version.txtdocker-compose.ymlreadme.mdstart.shload-images-only.shexport-logs.shbackup.shrestore.shscript-renew.sh -
Locate the start script in the new directory with the same name as the original file (
link_live_privatein this example). -
Move into this directory by running the command
cd link_live_private. -
Run the command
sudo ./start.sh.Your system will provide a series of prompts to complete installation.
Setting Up your Environment
-
To begin interactive setup on an Ubuntu system, run
sudo ./start.sh. -
An environment file (.env) is created as part of setup. Rerunning the
start.shscript allows you to load the corresponding environment configuration automatically. -
Run the script with the same user and permissions each time to avoid access issues.
Superuser Account Creation
The user and password variables are used on container startup to create a superuser account, which is necessary for the application to function correctly.
-
Use your superuser account to upload a new keyfile, create OTA unit updates, and for uploading Android applications.
-
Do not change the password on this account through the Link-Live UI, use it to claim units, or for other routine Link-Live functionality. You should instead create a new account via the "Create account" link on the login screen, or, if that button is disabled, by inviting users to an organization.
-
If you need to change the password on the super account, run
sudo ./start.sh auth.
Server Information and SSL/TLS Certificates
When Link-Live Private is started without any NGINX template configuration, it serves on both port 80 and on port 443, with the NGINX container managing certificates. Note that the NGINX container binds these ports to the host machine automatically.
-
Link-Live Private serves on ports 80 and 443 with NGINX handling SSL certificates. Port 80 redirects to port 443 (HTTPS).
-
Either supply the path to your certificate and key during the running of the
start.shscript, or replace default certificates innginx/certswith your own trusted SSL certificate.NOTE: Failing to replace these will result in port 443 using invalid, self-signed certificates.
-
Obtain an official SSL certificate by registering a domain (e.g., mycompany.com) with a certificate provider.
NOTE: Ensure you do not have
www.in your host name. For example,Link-Live-Private.mycompany.com.
-
To update certificates without restarting, run
sudo ./cert-renew.sh.This script, like the
start.shscript, optionally prompts you to supply paths to certificate files. If you have replaced the files manually, skip that prompt. It will then restart the NGINX container for you, with the new instance utilizing the new certificate files.
-
If desired, see the NGINX configuration template at
nginx/templates/default.conf.templateto implement your own certificate management strategy.
NOTE: NetAlly does not provide support for custom NGINX configurations.