Running Cable Test
The Cable Test app has general tests for cables as well as a toning function and a flash port function to help you trace cables and ports. You can also upload your results to Link-Live.
In this Topic
Cable Test Capabilities
Refer to LinkRunner 10G's Buttons and Ports as needed.
-
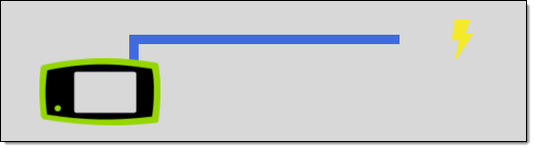
With an open or unterminated cable connected to the RJ-45 cable test port
-
Using a cable terminated with a WireView Cable ID accessory, you can measure cable length and identify shorts, opens, split pairs, crossover cables, normal or negative pair polarity, and shielded cables.
-
LinkRunner 10G cannot perform a cable test on a cable that is connected to a switch; however, you can still use the toning function to trace the cable to the connected port.
-
Additionally, you cannot run a cable test or use the toning feature if the unit detects voltage on the connected cable. The lightning bolt icon on the Cable Test screen indicates detected voltage.
Starting and Uploading
To start the cable test, tap START in the Cable Test screen header.

Uploading Results to Link-Live
The Link-Live upload icon ![]() in the app header indicates the status of uploaded or saved test results. Tap the icon to upload manually. See Uploading Test Results and Files in the Link-Live chapter for more information.
in the app header indicates the status of uploaded or saved test results. Tap the icon to upload manually. See Uploading Test Results and Files in the Link-Live chapter for more information.
Open Cable TDR Testing
LinkRunner 10G can measure the length of a cable and detect some faults by measuring the electrical reflections of the cable using Time Domain Reflectometry (TDR). Connect an open cable (unterminated) into the RJ-45 port on the
When a cable has no detected faults, "good" is shown next to each pair above the length measurement. Cable tests that detect a "split" or "open" in the cable also display the corresponding words.
This unterminated cable test image shows a shorted cable between pins 4 and 7.
Terminated WireView Testing
Using a WireView accessory provides more detailed, per-wire results. A WireView #1 is included with your LinkRunner 10G. Additional WireViews 2-6 are available for purchase.
To run a terminated cable test, connect the
The terminated cable test screen displays the number of the WireView attached, unless a cable fault prevents the LR 10G from detecting the WireView.
The image above indicates a crossover between pairs 1, 2 and 3, 6 and a WireView accessory number 5.
The last row of WireView results indicates whether the cable is shielded: an unbroken line between sh means a shielded cable is detected.
Toning Function
You can also trace a cable using a Fluke Networks IntelliTone™ Probe*, an analog probe, or the Tone function.
*IntelliTone is a trademark of Fluke Networks.
-
Connect a cable into the
-
Tap the floating action button (FAB)
 to display the tone menu:
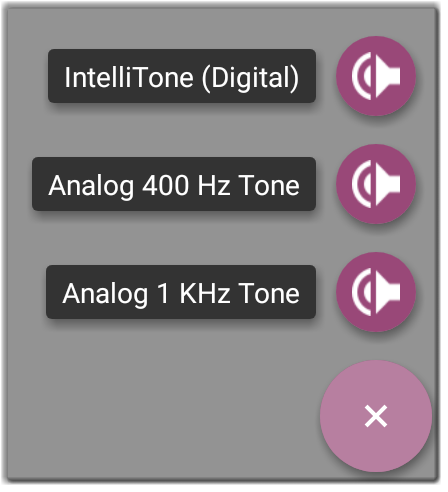
-
Select a Tone option from the menu. The LinkRunner 10G emits the tone through the cable, and the probe detects it, allowing you to trace the wire or locate it in a switch closet or rack.
Flash Port Function
Flash Port gives you the ability to make the LEDs blink on your unit's
To use the flash port feature:
-
Connect the
-
Tap the navigation menu icon
 or swipe from the left-side drawer to open the Cable Test Settings.
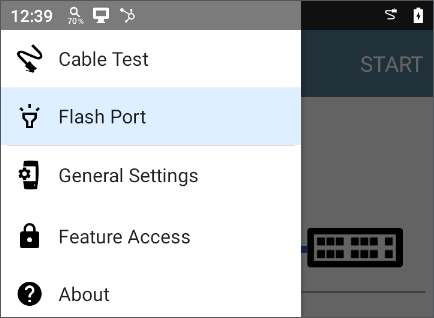
-
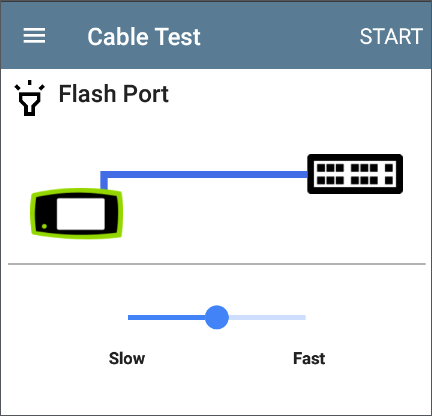
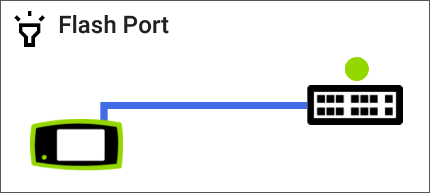
Tap Flash Port to open the Flash Port screen. If the connection to the switch is good, a blue line connects a test unit icon to a switch icon.
-
Use the slider to set the rate of the flash.
TIP: Some port LEDs may have trouble flashing at a very fast rate. Setting a rate slower than the maximum may work better.
-
Tap the Start button. When the flash function begins, a green circle appears over the switch icon and flashes at the rate you set with the slider. The green circle, the LEDs on the
-
When you finish using the Flash Port function, tap the Stop button.