Organizations
An organization is a shared workspace in Link-Live where team members and tester units are managed together. Each user belongs to one or more organizations and can switch between them. Each organization has its own set of units, results, files, and members, all visible to the organization's members.
To access organization settings, open the Organization dropdown menu from the top right of the Link-Live interface:
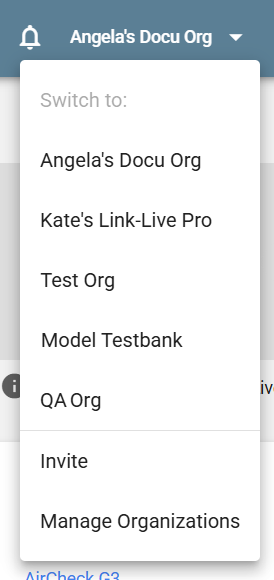
To switch organizations, select the organization you want to work in from the menu.
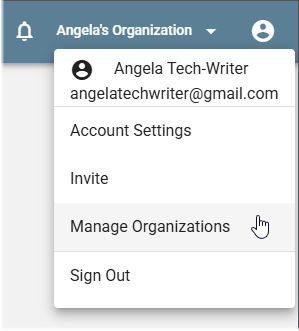
The Invite and Manage Organizations functions are also accessible from the user account drop-down menu.
Inviting Members
To invite a new member to an organization, select the Invite option in the Organization or User menu (shown above). A pop-up dialog allows you to enter the email addresses of those you want to invite. You can assign new members an Admin or Read-Only role.
Organization Roles
Each member of an organization is assigned one of three roles:
-
Owner – Full access to all features, including the ability to delete or transfer the organization.
-
Admin – Can claim units, invite members, and change organization settings.
-
Read-Only – Can view results and data but cannot make changes.
Managing Organizations
The Manage Organizations page shows an expandable card for each organization you belong to. Click the edit (pencil) icon to update the organization name, language preference, and required invitation domains. Click Invite to add new members.
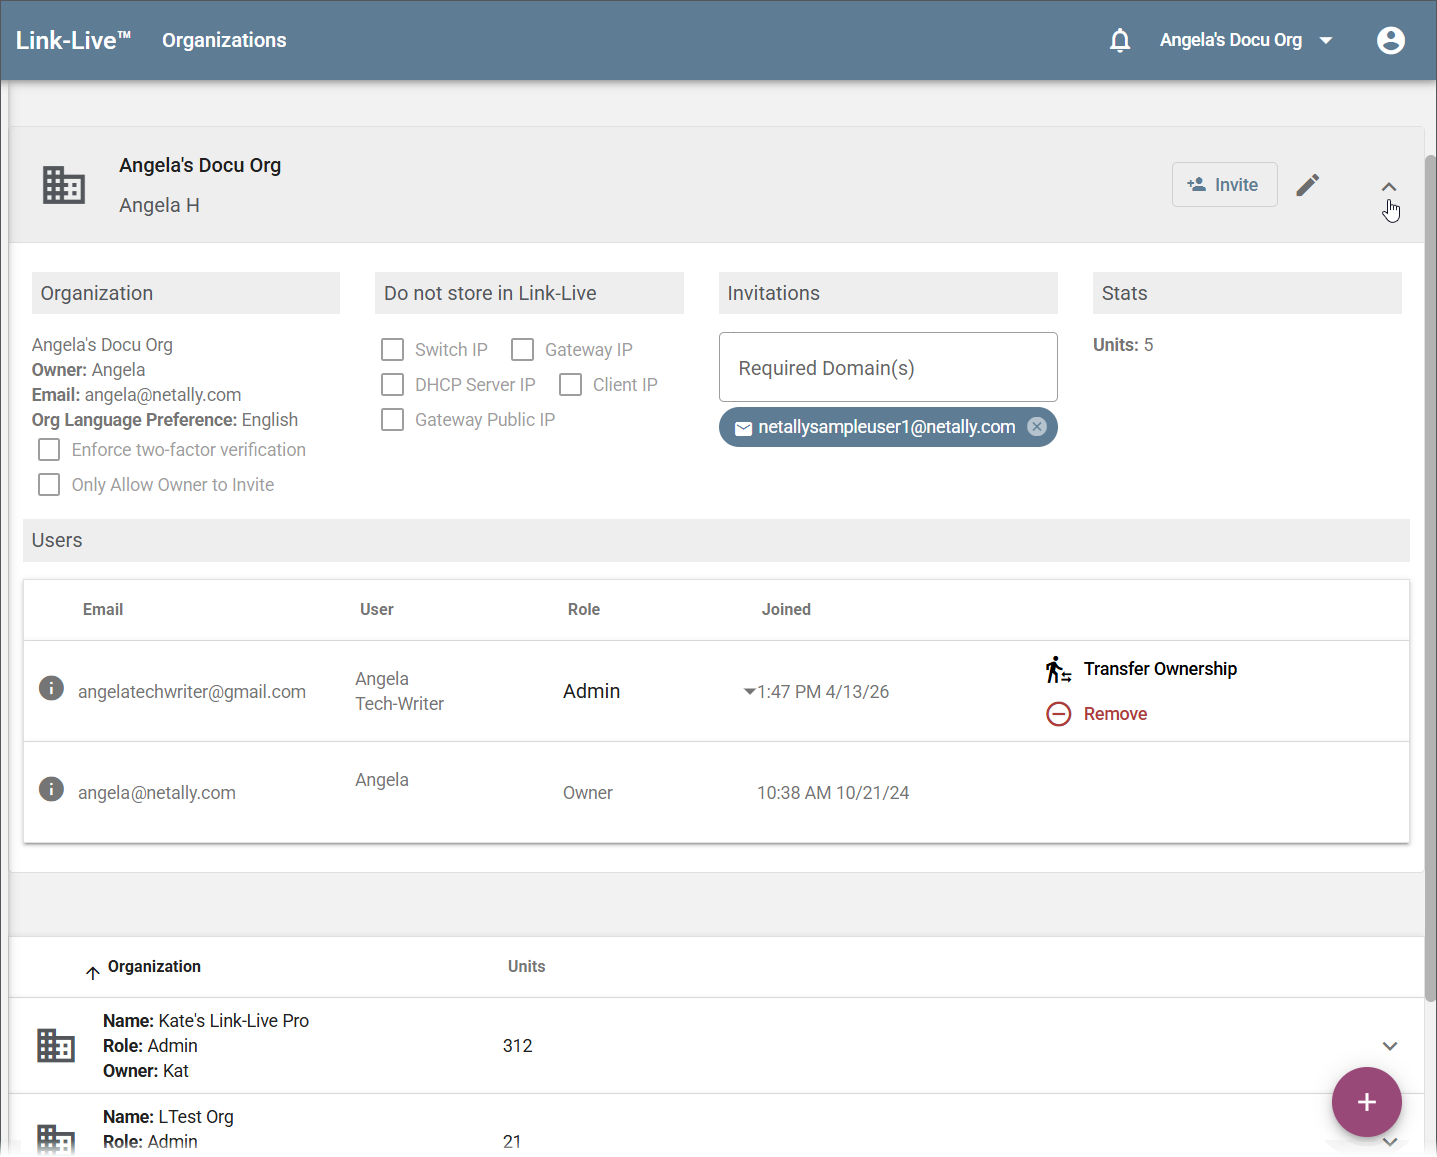
Each expanded organization card shows four panels:
-
Organization – Displays the organization name, owner, contact email, and language preference. Two additional options are available:
- Enforce two-factor verification – Requires all members to use two-factor authentication when logging in.
- Only Allow Owner to Invite – Restricts the ability to send invitations to the organization owner only.
-
Do not store in Link-Live – Select which IP address types should be excluded from storage when test results are uploaded. Options include Switch IP, Gateway IP, DHCP Server IP, Client IP, and Gateway Public IP.
-
Invitations – Use the Required Domain(s) field to restrict invitations to specific email domains. Pending invitations appear below.
-
Stats – Shows the total number of units claimed to the organization.
The Users table below the panels lists all organization members with their email address, display name, role, and join date. From this table, the owner or an admin can Transfer Ownership to another member or Remove a member from the organization.
The bottom of the page lists all organizations you belong to, showing the organization name, your role, the owner, and the unit count.
Creating a New Organization
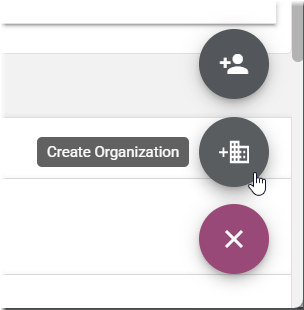
Click the floating action button (FAB) on the Organizations page to create a new organization.
Setting Up Sub-Organizations
You can set up a parent organization with sub-organizations beneath it to share test results with contractors or field technicians while keeping each team's work in its own organization. This setup allows results, AirMapper surveys, and other data to flow into both the parent and sub-organizations, and lets floor plans be sent to all units within the parent organization.
-
Create your parent organization using the floating action button (FAB) on the Organizations page.
-
Create your sub-organizations in the same way.
-
Claim the tester unit to the parent organization. See Getting Started in Link-Live for the claiming procedure.
-
In Link-Live, go to the Units page and select the appropriate unit from the list to view details.
-
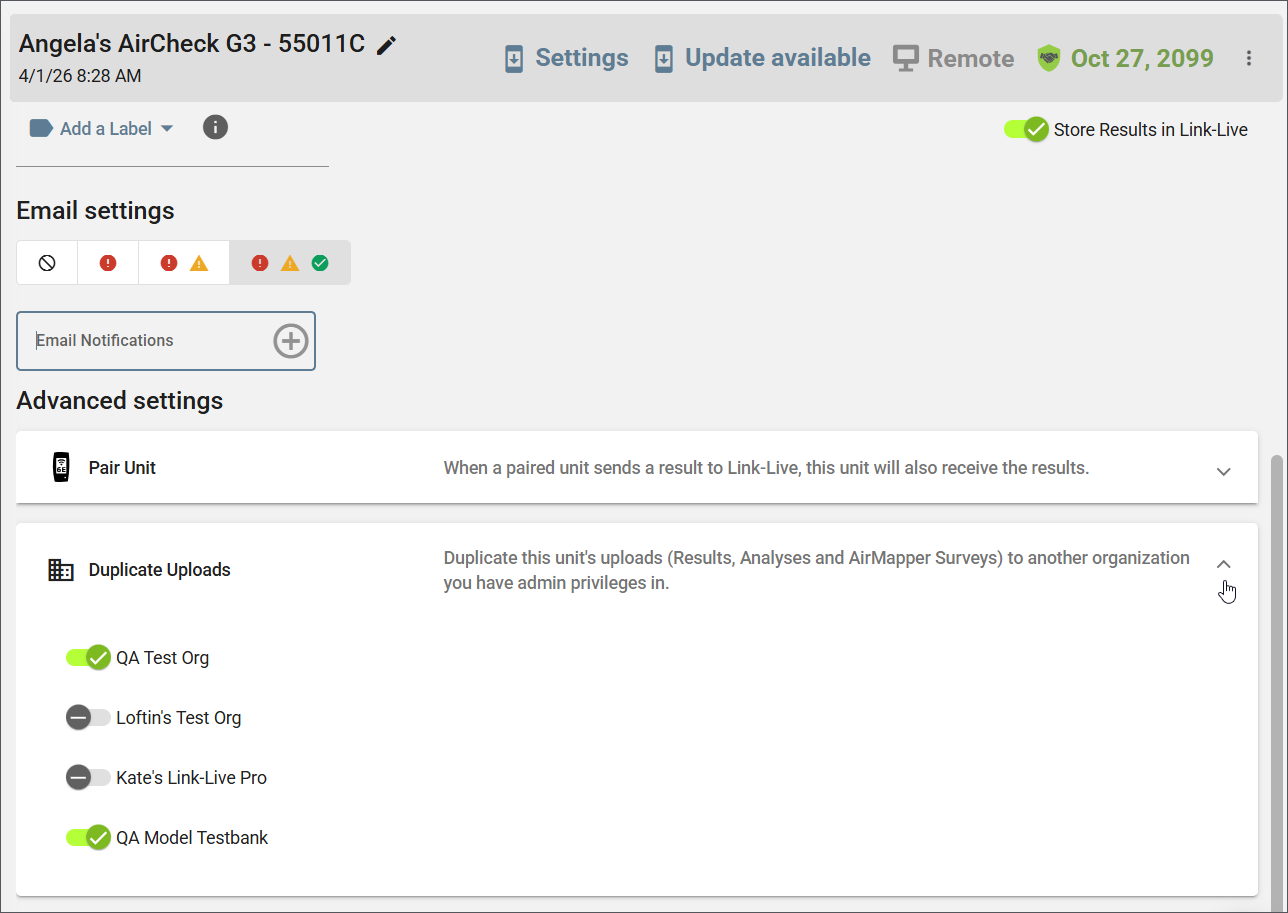
Scroll to the bottom of the unit details and open the Duplicate Results section under Advanced Settings.
-
Select the sub-organization you want results duplicated into.
Once configured, all results, AirMapper surveys, and other data collected by that unit will appear in both the parent organization and the selected sub-organization. Floor plans can be sent to all units within the parent organization.
Transferring or Deleting an Organization
To transfer ownership of an organization to another member, locate that member in the Users table and click Transfer Ownership. Ownership can only be transferred to an existing member of the organization. The previous owner retains Admin access after the transfer.
To delete an organization, click the overflow menu (⋮) in the top right of the organization card and select Delete. The Delete option is only visible to the organization owner and is not available if the organization is your only one.