Getting Started in Link-Live
This topic covers how to create a Link-Live account, claim your first tester unit, and navigate the Link-Live interface.
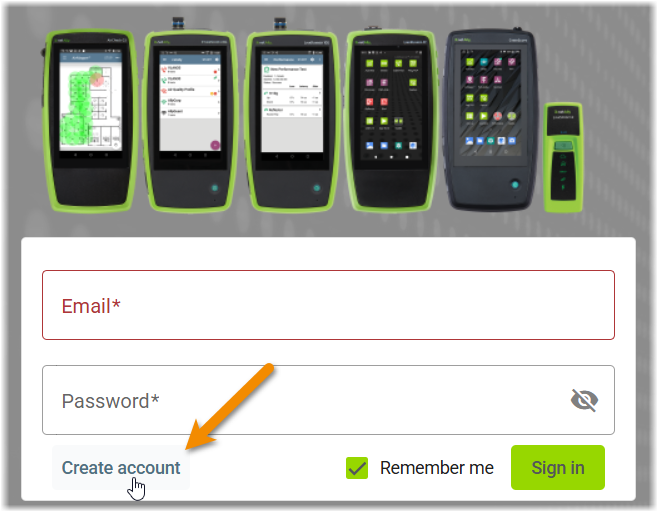
Create a Link-Live Account
-
Go to link-live.com and select Create Account on the Log-in page, or open the link in the invitation email you received.
-
In the new user form, enter your information and create a password.
-
Select the Create Account button at the bottom of the form.
-
Check your email for a Welcome to Link-Live message and click the activation link.
-
Log in to Link-Live with your new credentials.
If you haven't already been invited to an Organization, a series of pop-ups prompt you to name your first organization, claim a tester unit, and invite other users to your organization.
The Link-Live Interface
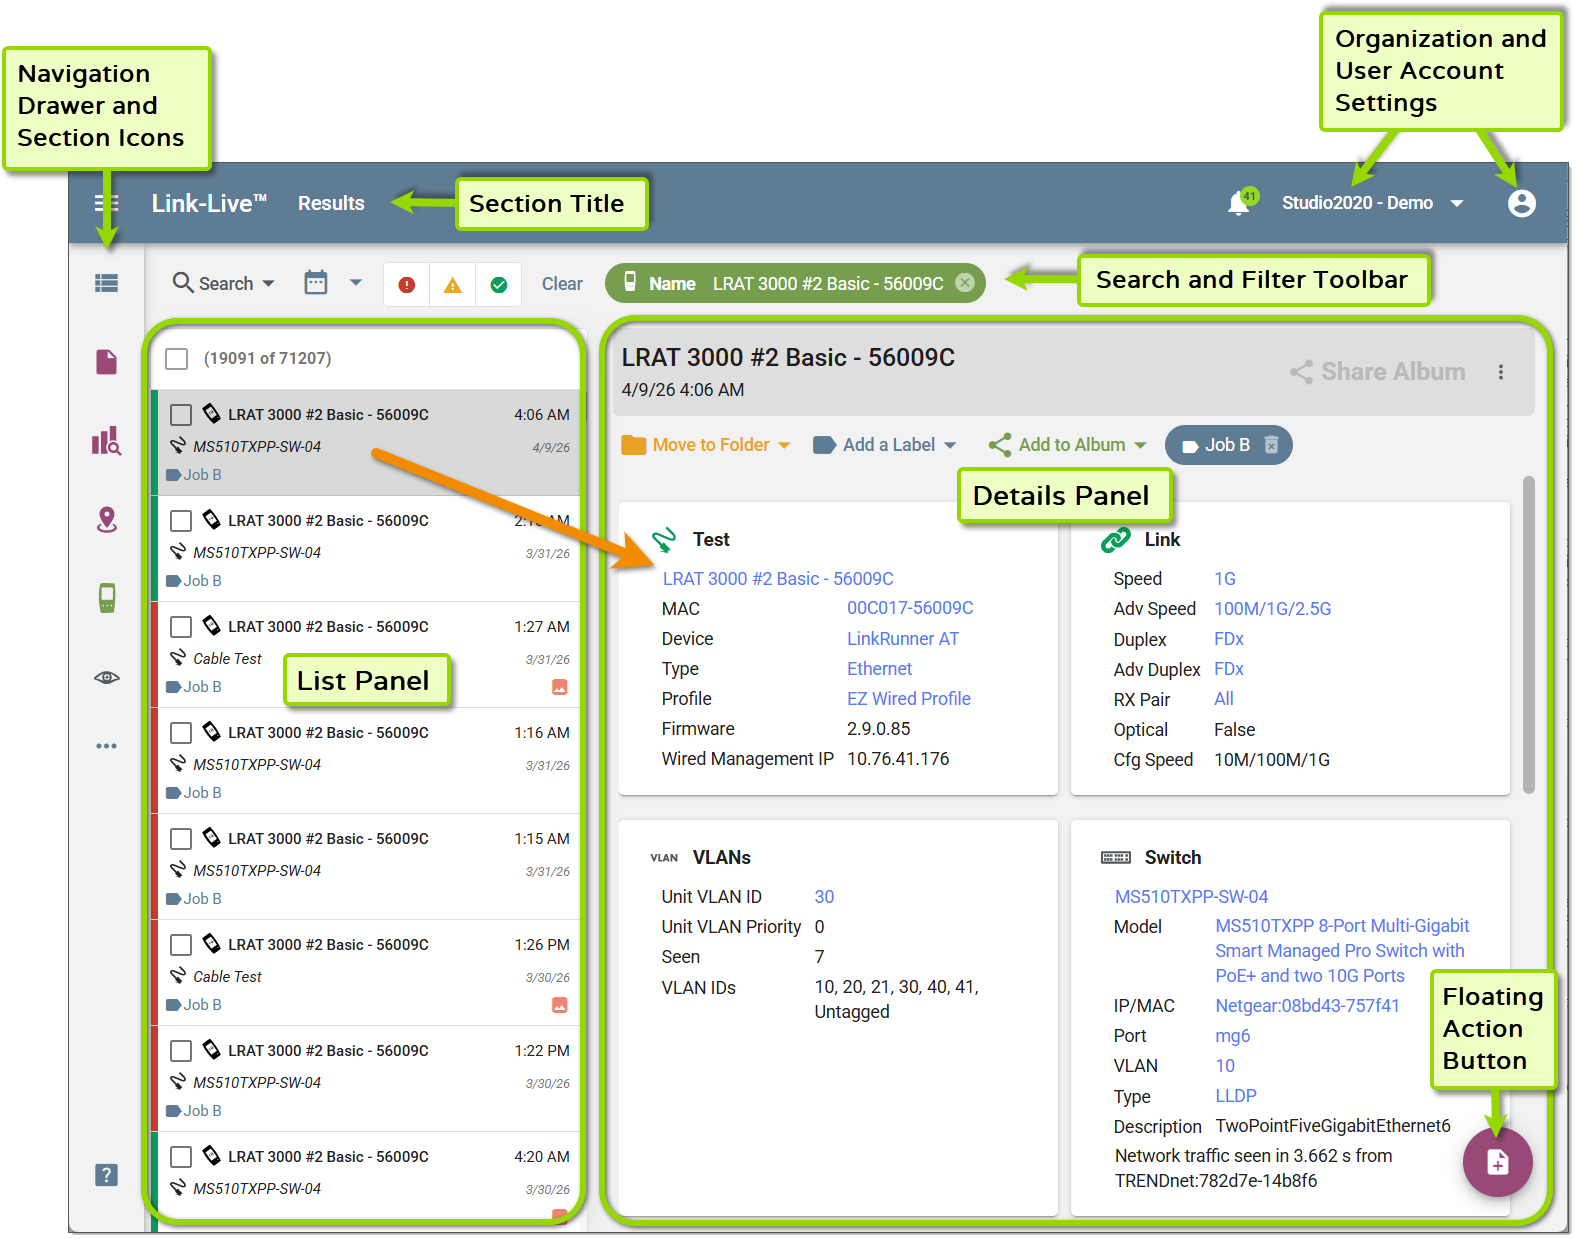
Most pages in Link-Live share a common layout with the following elements:
-
Navigation Drawer – Click any of the icons along the left side of the page to open the corresponding page or a sub-menu with related links. The hamburger icon in the top left opens the full navigation drawer to access all sections of Link-Live.
-
Section Title – The current page name is displayed in the top title bar.
-
Organization and User Account Settings – In the top right corner, the organization name drop-down menu lets you switch between organizations, and the person icon opens your user account settings.
-
Search and Filter Bar – Use the controls above the list bar to narrow items by name or other criteria. Active filters appear as tags that can be cleared individually.
-
List Panel – The left side of the page shows a scrollable list of items for the current section. A count at the top indicates how many items are shown versus the total available.
-
Detail Panel – The right side of the page displays details for the selected item in the list panel.
-
Floating Action Button – The floating button in the bottom right corner provides context-sensitive actions for the current page, such as claiming a unit or starting a new task.
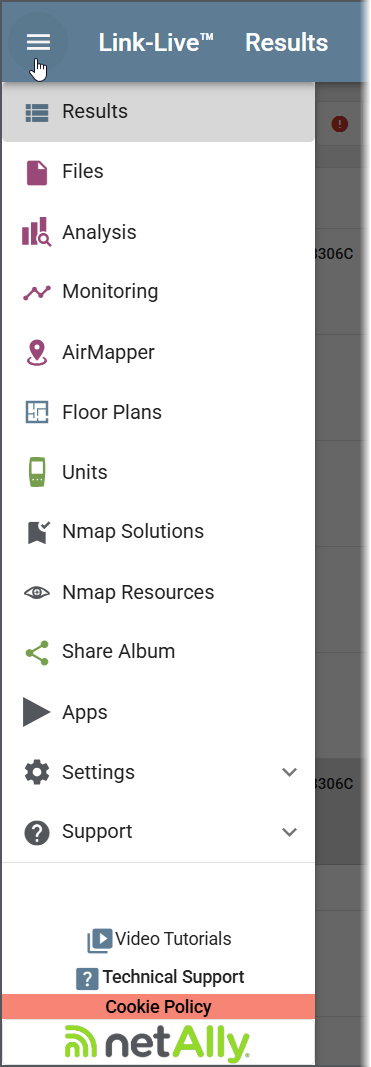
Left Navigation Drawer and Sub-Menus
The navigation drawer gives you access to all major areas of Link-Live.
-
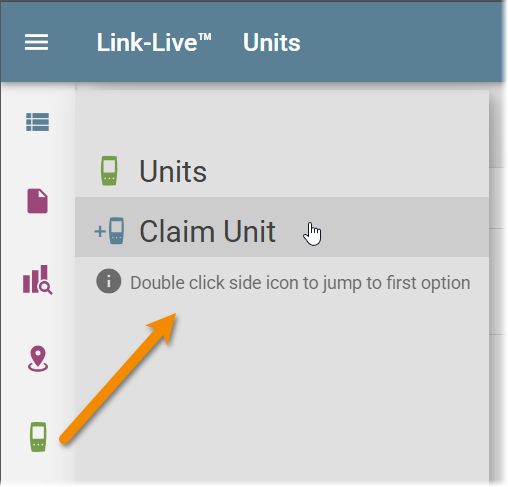
Select an icon in the collapsed drawer to go to the corresponding page or open a sub-menu with links to the page as well as additional actions.
The image below shows the sub-menu for the Analysis features, including the top link to the main Analysis list page, a link to the Monitoring session list page, and the option to import an Analysis file.

-
Double-click an icon to skip the sub-menu and go to the first main page.
-
Click the hamburger menu button to see the full drawer.
|
Results – View and filter AutoTest and other results uploaded from your units. Files – Access files transferred from your testers, generated reports, and Share Albums. Analysis – Analyze Discovery, Wi-Fi, and Path data uploaded from your units. Monitoring – Review Discovery and/or Wi-Fi data collected at specified intervals and investigate changes to the network. AirMapper – View Wi-Fi site survey results and manage floor plans. Floor Plans – Upload and manage floor plan images for use in AirMapper surveys. Units – Manage claimed testers, view their status, and claim new units. Cyber/Nmap – Upload and manage Nmap scripts and resources for CyberScope devices. Sub-menu provides access to Nmap Solutions, Nmap Resources, and Import Resource. Share Album – Create and share curated collections of results, analyses, and files. See Labels, Folders, and Albums. Apps – Browse the curated catalog of third-party apps available for NetAlly testers. Apps are downloaded on the tester unit itself. Settings – Opens a sub-menu for device-specific settings pages (EtherScope nXG, CyberScope) and shortcuts for Upload App and Claim a Unit. Support – Opens a sub-menu with links to Video Tutorials, Knowledge Base, Software Downloads, API Documentation, User Guides, Contact Us, About, and Feedback. NOTE: The data and features available in Link-Live depend on the capabilities of your NetAlly tester. See the NetAlly Product Comparison Chart at NetAlly.com. |
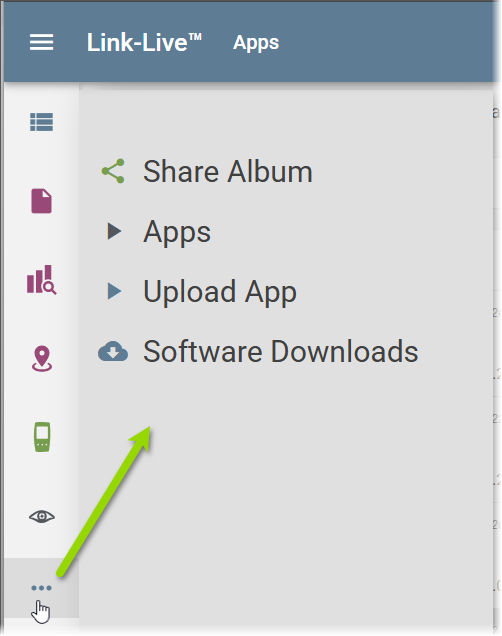
The three-dot overflow button ( ... ) at the bottom of the collapsed navigation sidebar provides quick access to Share Album, Apps, Upload App, and Software Downloads.
See Interface Essentials for details on using Link-Live's features for reviewing, organizing, and sharing data.
Claim a Tester Unit
Claiming connects a NetAlly tester to your Link-Live organization so it can upload results and receive software updates.
-
In Link-Live, go to the Units page, and click the floating action button (FAB) to start the claim process.
Or select Claim Unit from the Units sub-menu in the navigation drawer.
-
In the pop-up claiming dialog, select your tester type, then follow the on-screen instructions for that specific tester.
-
If you are using an AllyWare tester (with a touchscreen), open the Link-Live app from the Home screen and note the MAC address displayed on the screen.
-
Enter the tester's MAC address in Link-Live and click Listen.
-
Touch CLAIM NOW on your AllyWare tester.
When claiming is successful, a pop-up dialog allows you to rename the unit. This name also appears on your tester interface.
The unit then appears in your Units list.
Once claimed, your tester automatically uploads test results to Link-Live whenever it has a network connection. Results buffered while offline upload automatically when connectivity is restored.
For more information on managing units, see Units .
Invite Team Members
You can invite colleagues to your organization so they can view and manage shared results.
-
Go to Organizations and select your organization.
-
Click Invite Member and enter the person's email address.
-
The invitee receives an email with a link to join the organization. If they do not yet have a Link-Live account, they are prompted to create one.
For more details, see Organizations.
Manage Your User Account
To update your account information, click the user icon at the top right, and select Account Settings. From there you can update your name, location, and language preference, or delete your account.
If you belong to multiple organizations, use the Organizations dropdown menu to switch between them.
Next Steps
Once your unit is claimed and uploading results, explore what Link-Live can do:
-
View and filter AutoTest results on the Results page. See Results.
-
Explore additional features for organizing and managing results and data. See Interface Essentials.
-
Analyze Discovery, Wi-Fi, and Path data on the Analysis pages. See Analysis.
-
View AirMapper site survey data on the AirMapper page. See AirMapper.
-
Claim additional NetAlly testers to your organization and manage tester settings. See Units
-
Generate PDF and CSV reports and SVG topology exports from within the Results, Analysis, and AirMapper pages. See Reports.