Nmap
Nmap
The Cyber section in Link-Live provides access to Nmap (Network Mapper) functionality for CyberScope devices. Click the Cyber icon in the navigation drawer to open its sub-menu, which provides access to:
-
Nmap Solutions – Browse, manage, and distribute pre-configured Nmap scan setups to CyberScope devices.
-
Nmap Resources – Upload, manage, and distribute Nmap scripts and libraries to CyberScope devices.
-
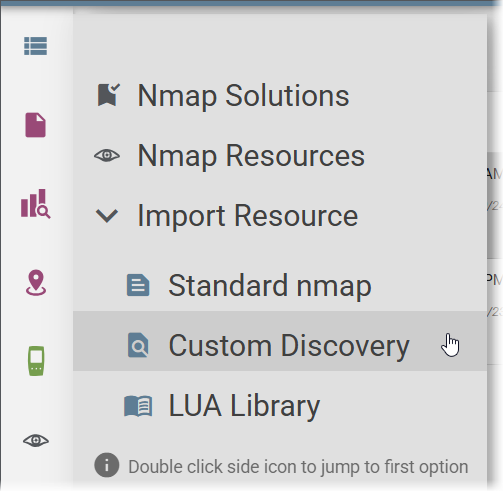
Import Resource – Expands to show three direct import options: Standard nmap, Custom Discovery, and LUA Library. Click any sub-item to import that resource type directly.
Tip: Double-click the Cyber icon in the navigation drawer to jump directly to Nmap Solutions.
 Nmap Solutions
Nmap Solutions are pre-configured Nmap scan setups stored in Link-Live that can be distributed to your CyberScope devices. Each Solution packages a complete scan configuration, including command options and any required scripts, under a descriptive name with usage notes.
The Solutions list shows all available Solutions with their names, filenames, and labels. Selecting a Solution opens its detail panel, which shows a description explaining what the scan does, what command it uses, and when to use it.
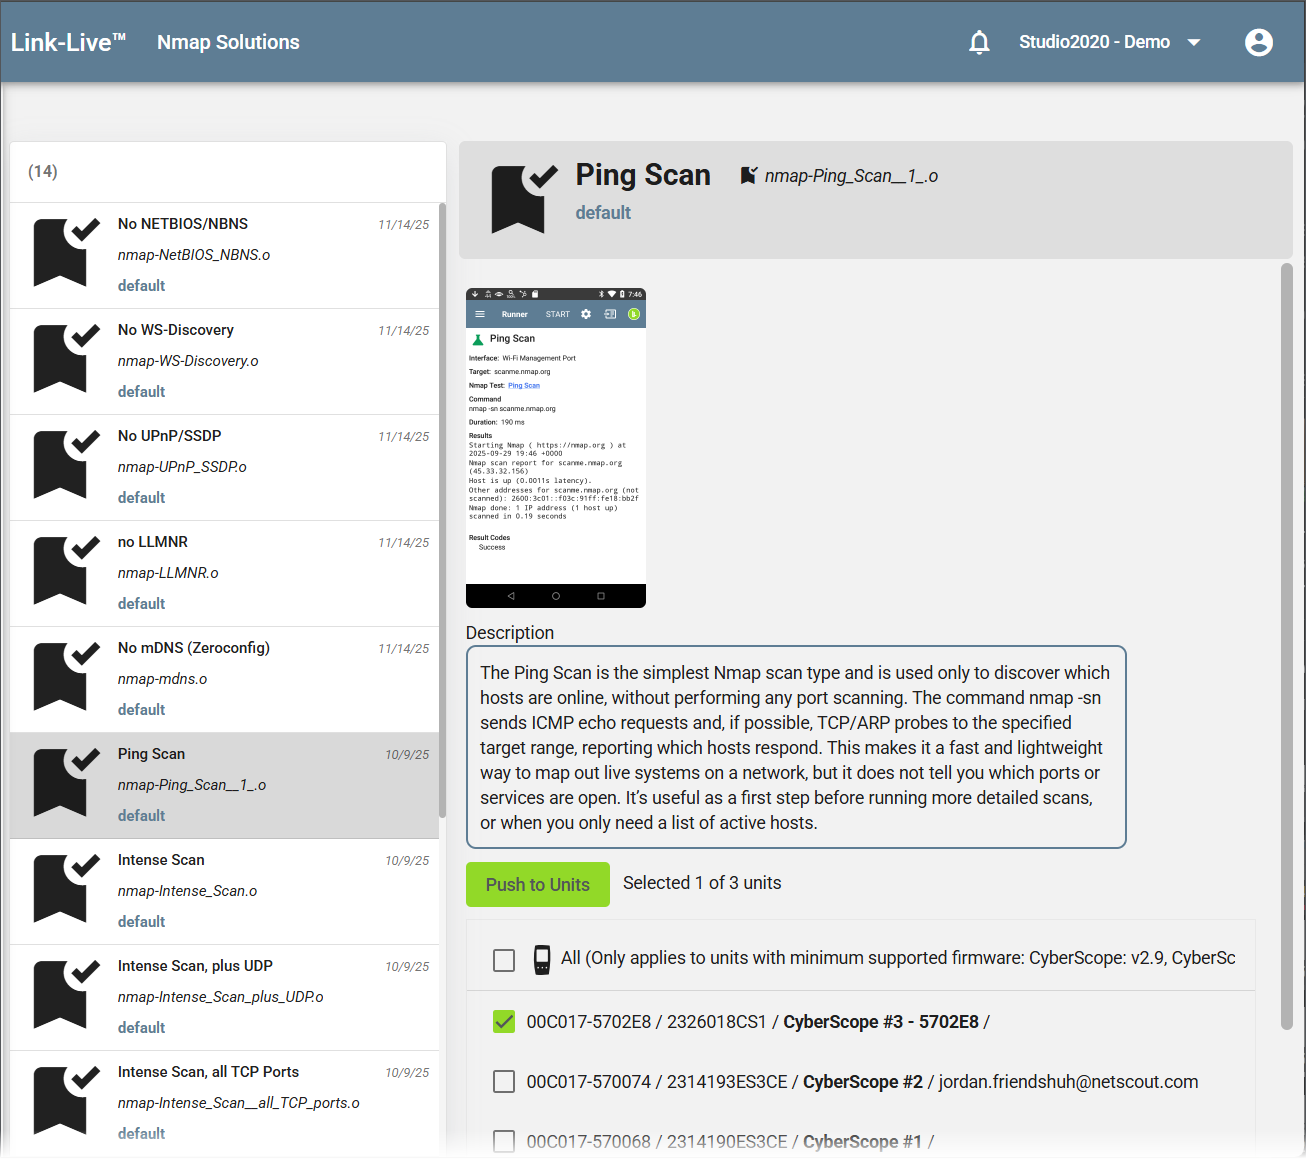
To push a Solution to one or more CyberScope devices, select the target units in the lower portion of the detail panel and click Push to Units. A minimum supported firmware version is required; the note above the unit list indicates the required version for CyberScope and CyberScope Air.
Nmap Resources
The Nmap Resources section lets you upload, manage, and distribute Nmap script files and libraries to your claimed CyberScope devices. Three resource types are supported:
-
Standard nmap – Standard Nmap Scripting Engine scripts that run against one device at a time. Can be used through the Discovery app, an AutoTest profile, or the Nmap app on the CyberScope.
-
Custom Discovery – Scripts that run as part of the Discovery app. Unlike standard NSE files (which receive only the target IP address), custom Discovery scripts receive additional parameters based on the type of device discovered.
-
LUA Library – Lua library files used by NSE scripts.
Uploading a Resource
To upload a new resource, click Import Resource, select the resource type (Standard nmap, Custom Discovery, or LUA Library), select the file from your computer, and click Import. The file appears in the Nmap Resources list.
Managing Resources
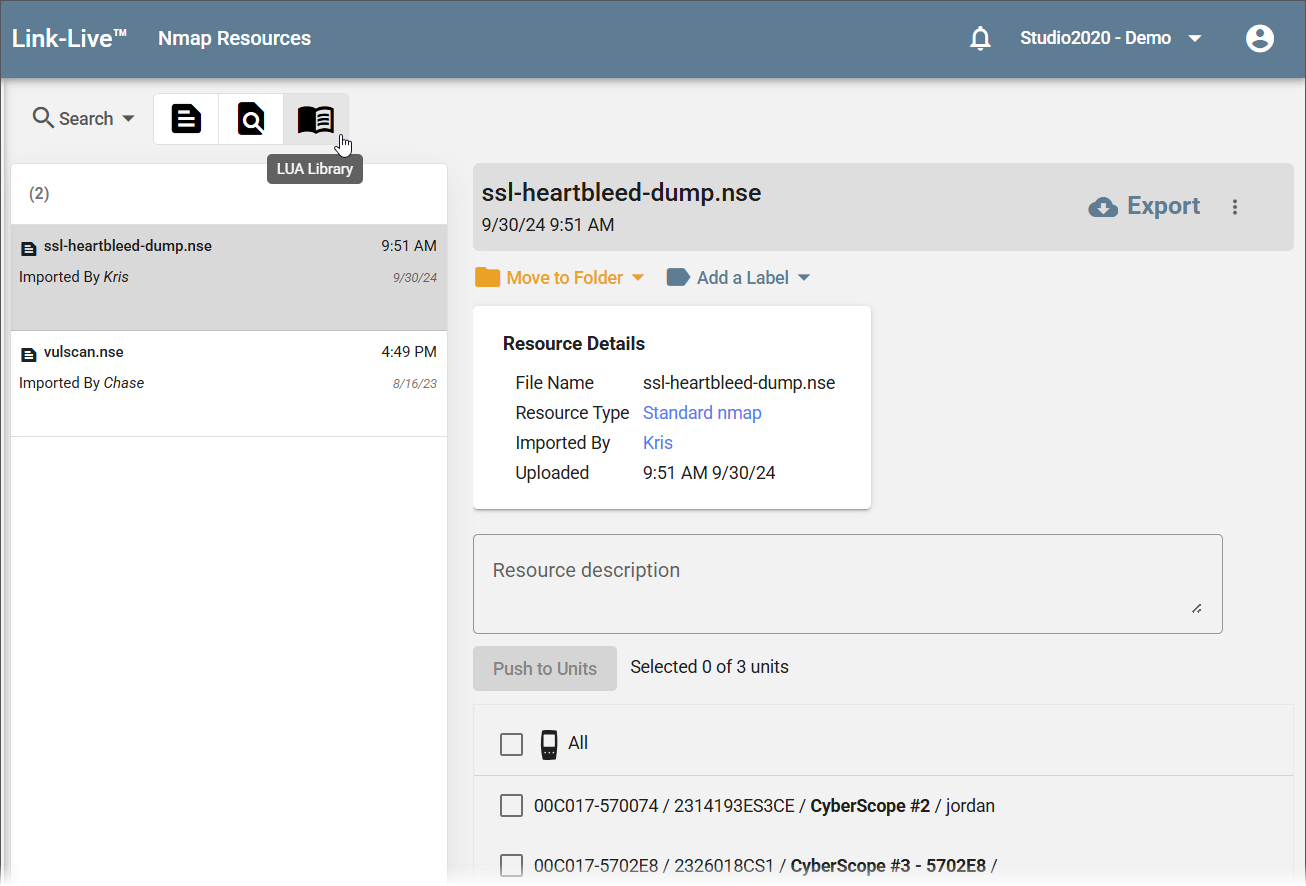
Selecting a resource in the list opens a detail panel showing the file name, resource type, who imported it, and the upload date. From here you can:
-
Enter or edit a Resource description so other users know what the script does.
-
Use Move to Folder and Add a Label to organize the resource.
-
Click Export to download the script back to your computer.
Pushing Resources to Units
The lower portion of the Nmap Resources page lists your claimed CyberScope devices. Select one or more devices and click Push to Units to distribute the resource to the selected testers.
Running an Nmap Scan
Nmap scans are run directly from the Nmap app on a NetAlly tester; scans cannot be initiated from Link-Live. Once a scan completes, results are automatically uploaded to Link-Live when the tester has a network connection. If the tester is offline, results upload automatically when connectivity is restored. You can also upload manually by tapping the Link-Live icon in the Nmap app header on the tester.
Nmap tests can also run as part of an AutoTest profile or the Discovery app on the tester, with results uploading to Link-Live in the same way.
Viewing Nmap Results
Results Page
Completed Nmap scans upload to Link-Live automatically and appear in the Results section. Use the Nmap type filter in the search bar to show only Nmap results. Each entry in the list shows the unit name, date and time, and labels including the scan name and target.
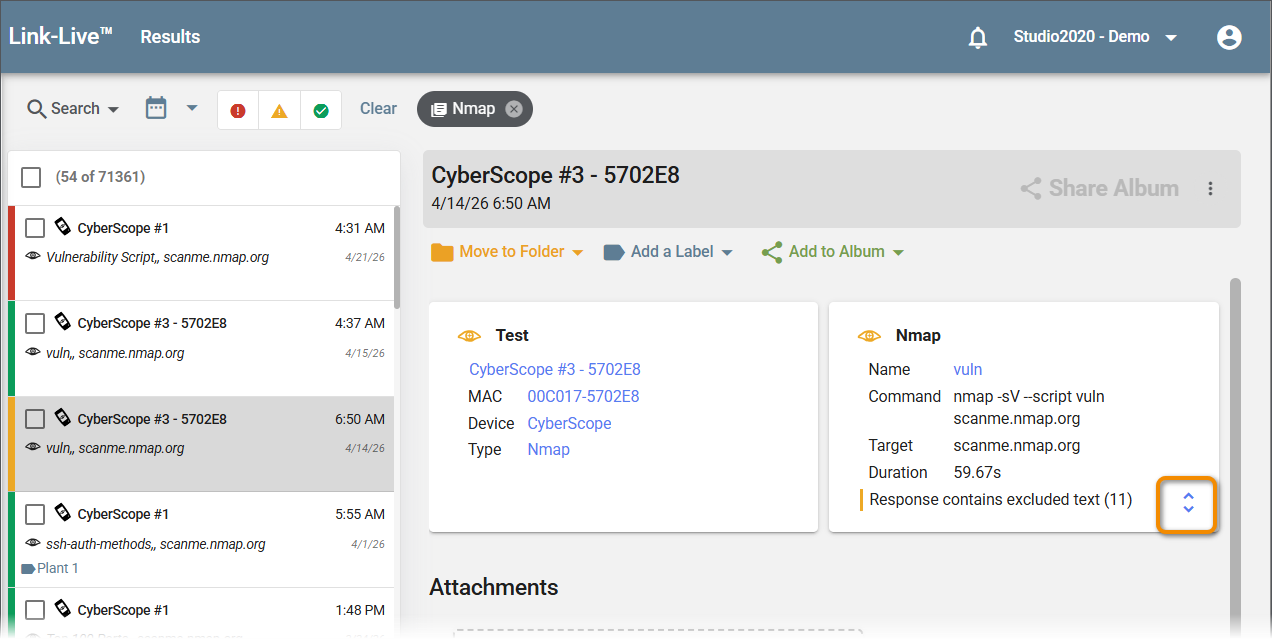
Selecting a result opens the detail panel with two cards:
-
Test – Shows the unit name, MAC address, device, and result type, each hyperlinked to filter the Results list.
-
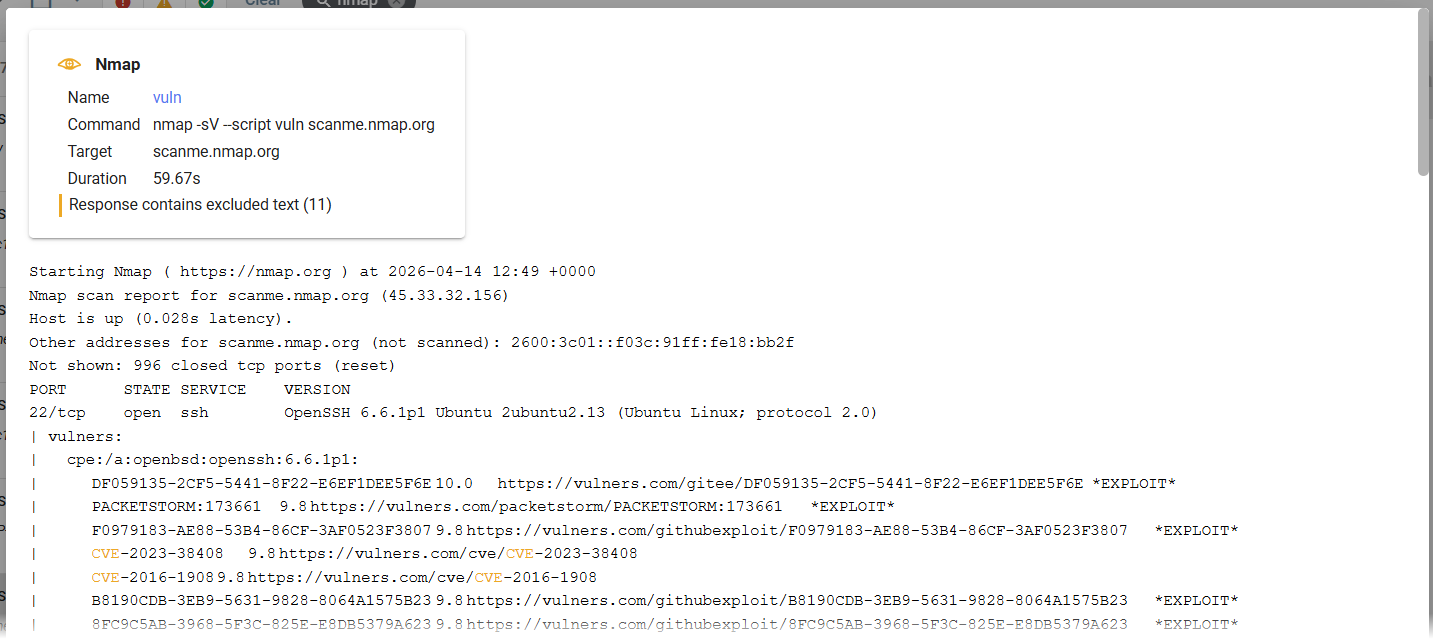
Nmap – Shows the scan name, full command, target, and duration. If the scan output includes text matching a configured exclusion, a notice such as "Response contains excluded text (11)" appears with a count of excluded items. Click the expand button on the Nmap card to display the full raw scan output below, including open ports, detected services and versions, and any vulnerability findings with links to external references.
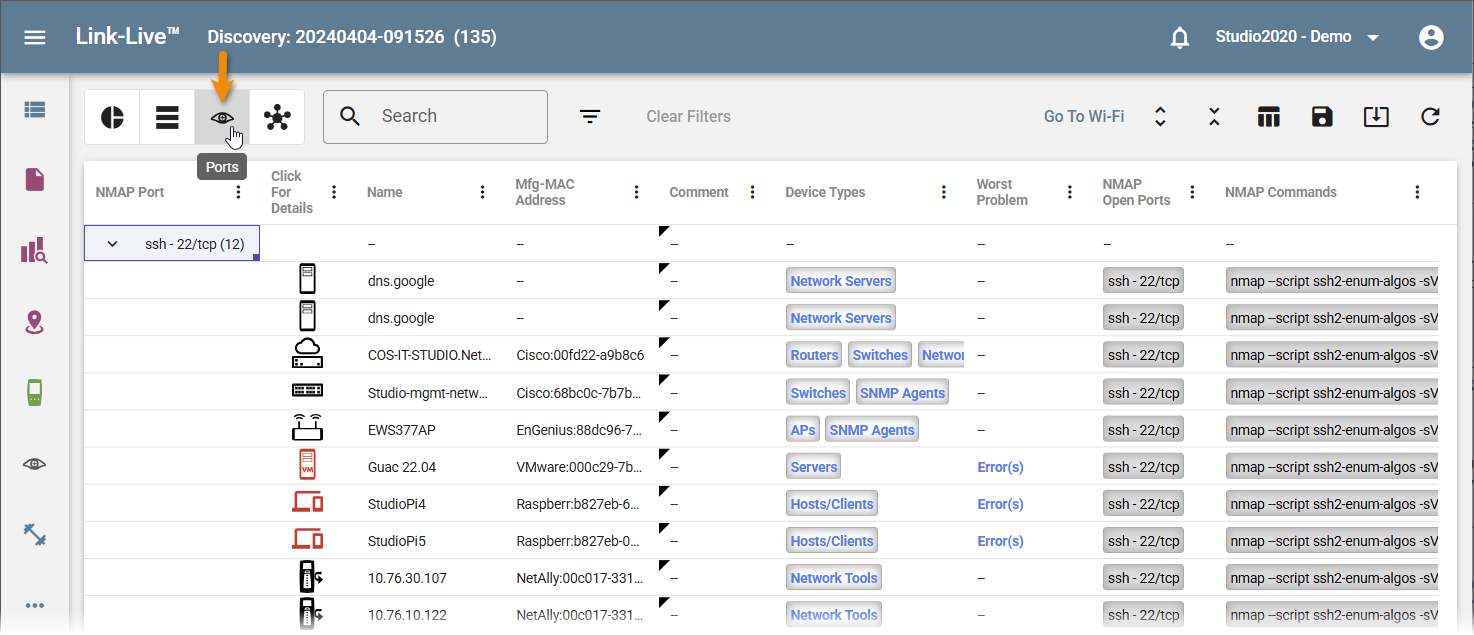
Discovery Ports View
When Nmap scans run as part of a Discovery session, results also appear in Discovery Analysis. In the Discovery Details view, click the Ports icon in the toolbar to switch to the Ports view, which groups devices by Nmap port. Expand a port group to see each device with that port open, along with the NMAP Open Ports and NMAP Commands columns showing what was detected and which commands were run. See Discovery Analysis for more information on the Ports view.