AirMapper Surveys List and Details
The survey list on the main AirMapper page shows all surveys uploaded to your organization. Each entry displays the survey name, date and time, and the unit that collected it. Survey type icons in the search and filter bar let you narrow results to passive, active, or Bluetooth surveys in the list.
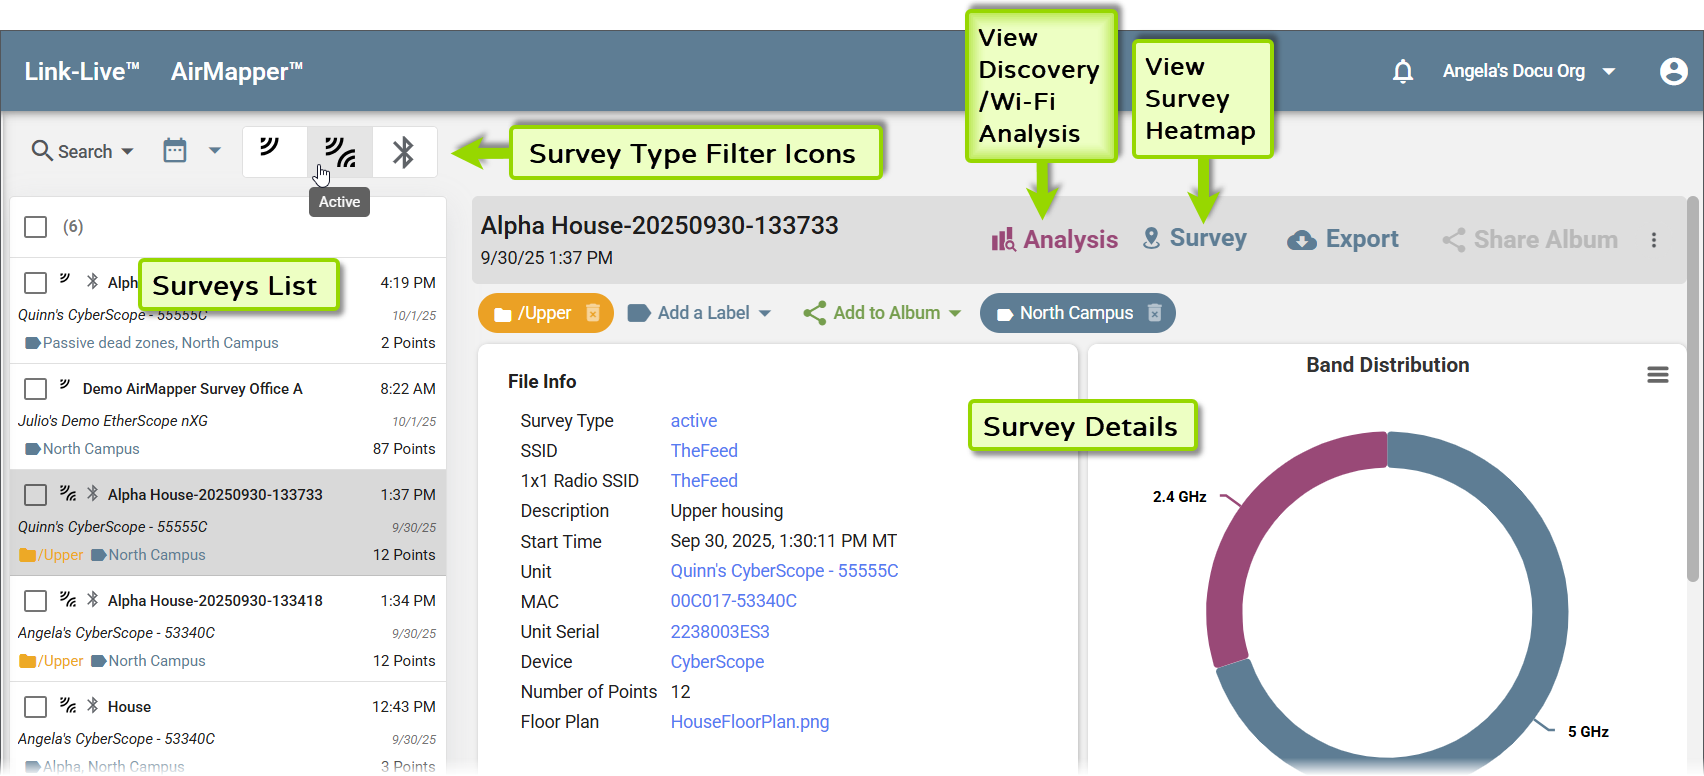
Selecting a survey opens its details in the detail panel. The File Info card shows the survey type, SSID, description, start time, unit name, MAC address, serial number, device model, number of survey points, and floor plan. Distribution, Channel Width, top devices, and other graphs appear lower in the survey details panel.
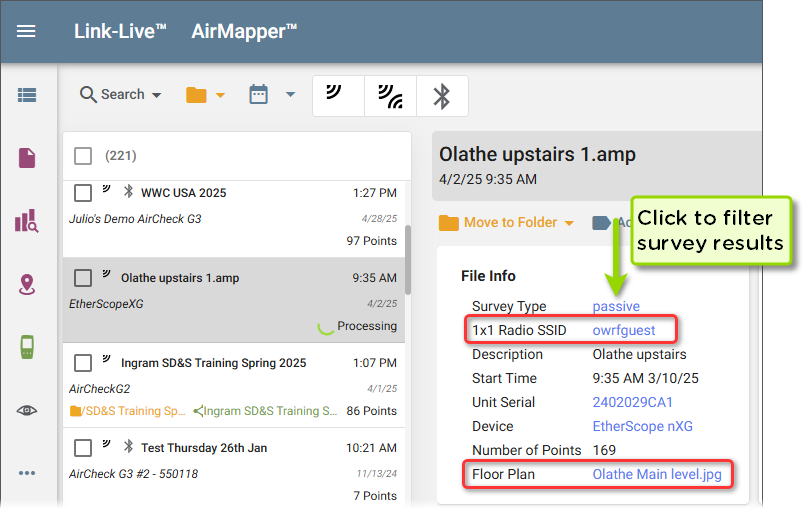
Fields such as SSID and Floor Plan Name in the File Info card are hyperlinks. Click a hyperlink to filter the survey list to show only surveys matching that value.
The detail panel toolbar provides the following survey actions:
-
Analysis – Opens the associated Discovery and Wi-Fi Analyses for the survey session on the Analysis screen.
-
Survey – Opens the survey heatmap page. See Survey Heatmap.
-
Export – Exports the survey as an .amp file. See Exporting an .amp File below.
Use Move to Folder, Add a Label, and Add to Album to organize surveys. See Labels, Folders, and Albums.
NOTE: Large surveys may take several minutes to process. If a survey fails to process, a Retry button appears in the page header. Click it to reinitiate processing.
Merging Surveys
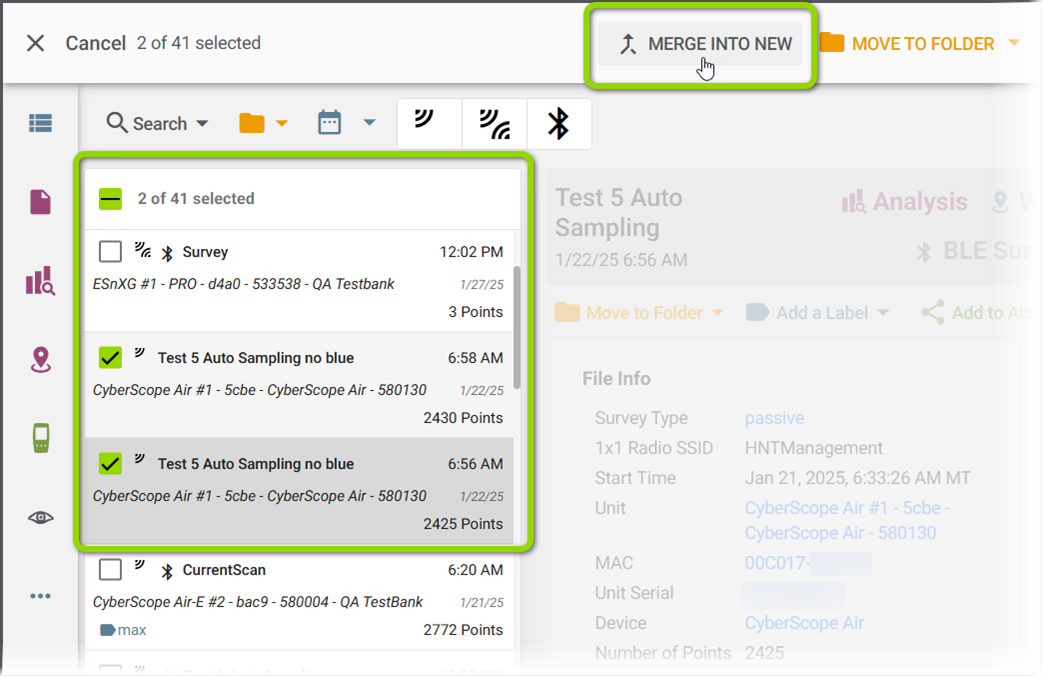
If a site survey was split into multiple files, for example, because available memory on the tester was reached mid-survey, you can merge those files into a single survey in Link-Live.
To merge survey files:
-
Select the checkbox next to each survey you want to merge.
-
Click the MERGE INTO NEW button at the top of the page.
-
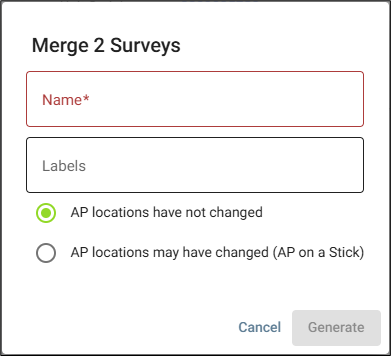
Enter a name for the merged survey.
-
Ensure the AP Locations have not changed option is selected.
-
Click Generate.
Archived Surveys
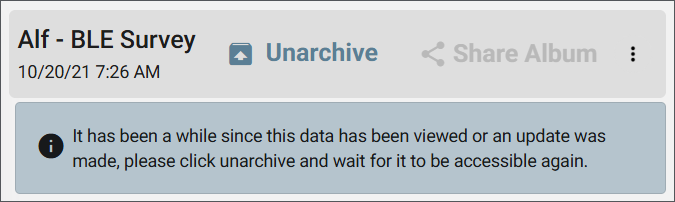
Surveys that have not been viewed for 30 days, or since Link-Live updated, are automatically archived. An archived survey displays an Unarchive button in the list along with a notice. Click Unarchive and wait for the data to become accessible before opening the survey.
Importing and Exporting Surveys
Importing an .amp File
To import an AirMapper survey from an .amp file, click the floating action button on the main AirMapper list page and select Import .amp File. Enter a descriptive name, select the file, and click Upload. Once processed, the survey appears in the AirMapper list and is available for analysis.
Exporting an .amp File
To export a survey as an .amp file, select the survey in the list and use the export option above the detail panel. The .amp file contains all survey data and can be used for two purposes:
-
Open in AirMagnet Survey Pro – The exported file can be opened in AirMagnet Survey Pro for further analysis.
-
Transfer to another organization – Import the .amp file into a different Link-Live organization, allowing others to view the survey results without access to your organization.
Floor Plans
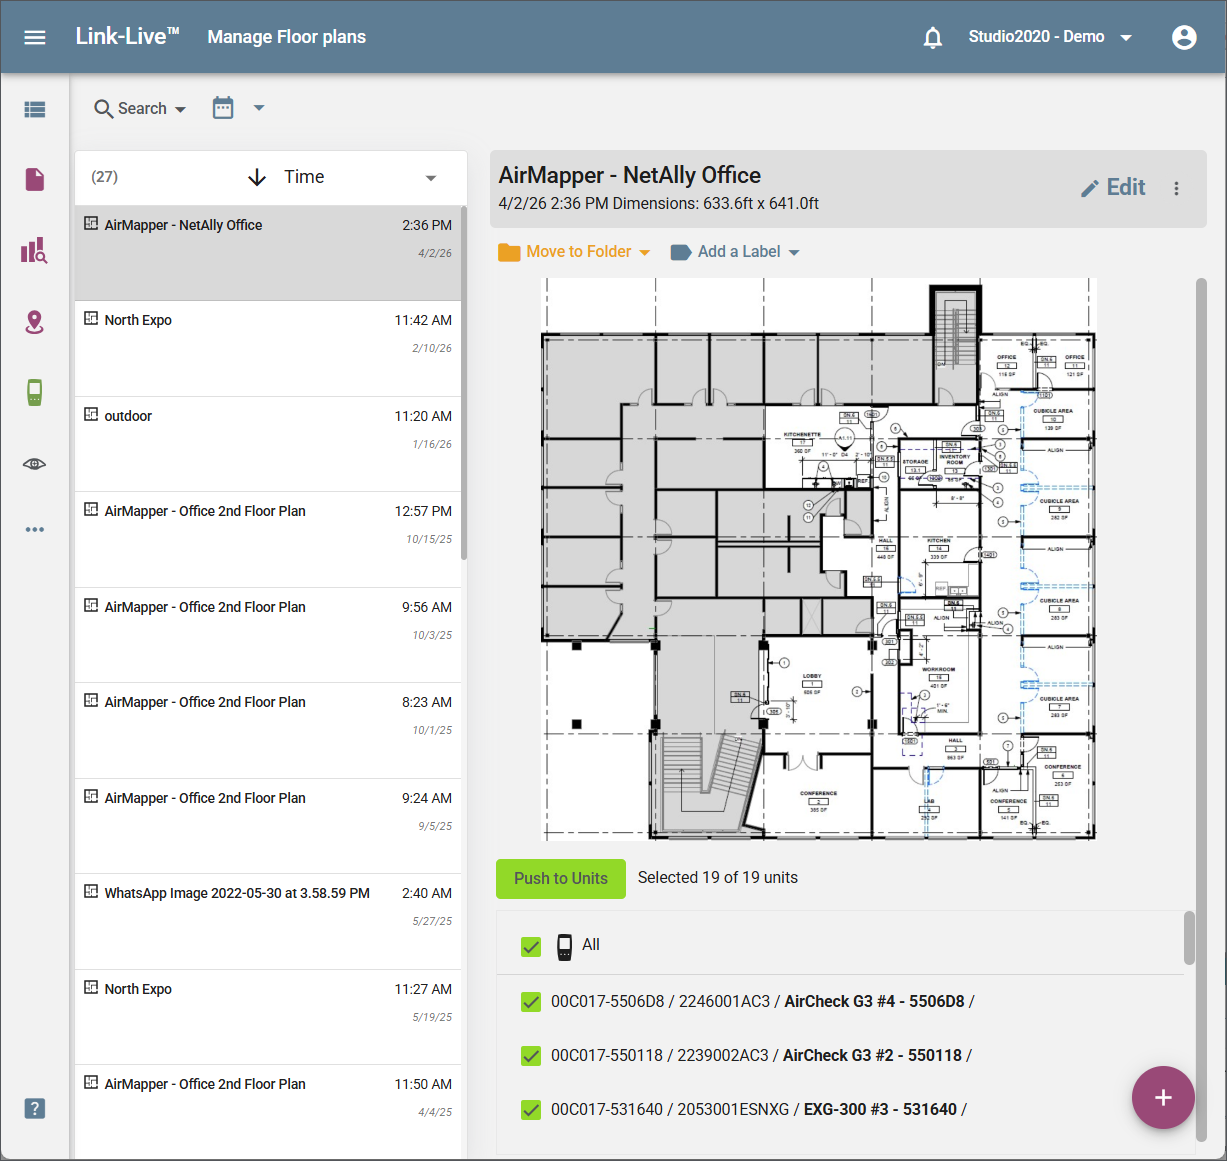
Floor plans are the map backgrounds used in AirMapper surveys. The Manage Floor Plans page uses the standard list and detail panel layout. Each entry in the list shows the floor plan name and date.
The detail panel shows the floor plan name, date, and dimensions, with an Edit button, overflow menu (⋮), and options to Move to Folder and Add a Label.
Uploading a Floor Plan
To upload a new floor plan, click the + (FAB) in the bottom right corner and select a floor plan image file from your computer. Once uploaded, the floor plan appears in the list and is ready to push to connected testers.
Calibrating a Floor Plan
After uploading, calibrate the floor plan to set its real-world dimensions. Select the floor plan and click Calibrate Floor Plan. Drag the calibration tool to a starting point on the floor plan, click, then drag to an ending point and click again. Enter the real-world distance between the two points.
Link-Live uses this measurement to calculate the floor plan's height and width. For best accuracy, choose two points as far apart as possible.
After calibrating, set the Signal Propagation distance—the estimated range of the Wi-Fi signal in your environment. Use a shorter value for environments with more RF obstructions (such as dense office spaces or hotels) and a longer value for open areas. Click Save when done.
Sending a Floor Plan to Units
To push a floor plan to one or more testers, select the floor plan in the list and click Push to Units. A checklist of available units appears, identified by MAC address, serial number, and unit name. Use the All checkbox to select all units, or select individual units, then confirm the push.
Managing Floor Plans
Use the Edit button in the detail panel to rename or replace a floor plan. The overflow menu (⋮) provides additional management options. Click the FAB (+) to add a new floor plan.