Labels, Folders, and Albums
Link-Live provides three color-coded organizational tools for grouping and managing your content. The toolbar above the Details Panel on most Link-Live pages gives access to all three tool types. Applied tags also appear on each item's entry in the list panel.
-
Labels (blue) – User-defined text tags for categorizing and filtering items.
-
Folders (orange) – Hierarchical path-based folders for organizing items into groups.
-
Albums (green) – Named collections of items that can be shared externally via a link.
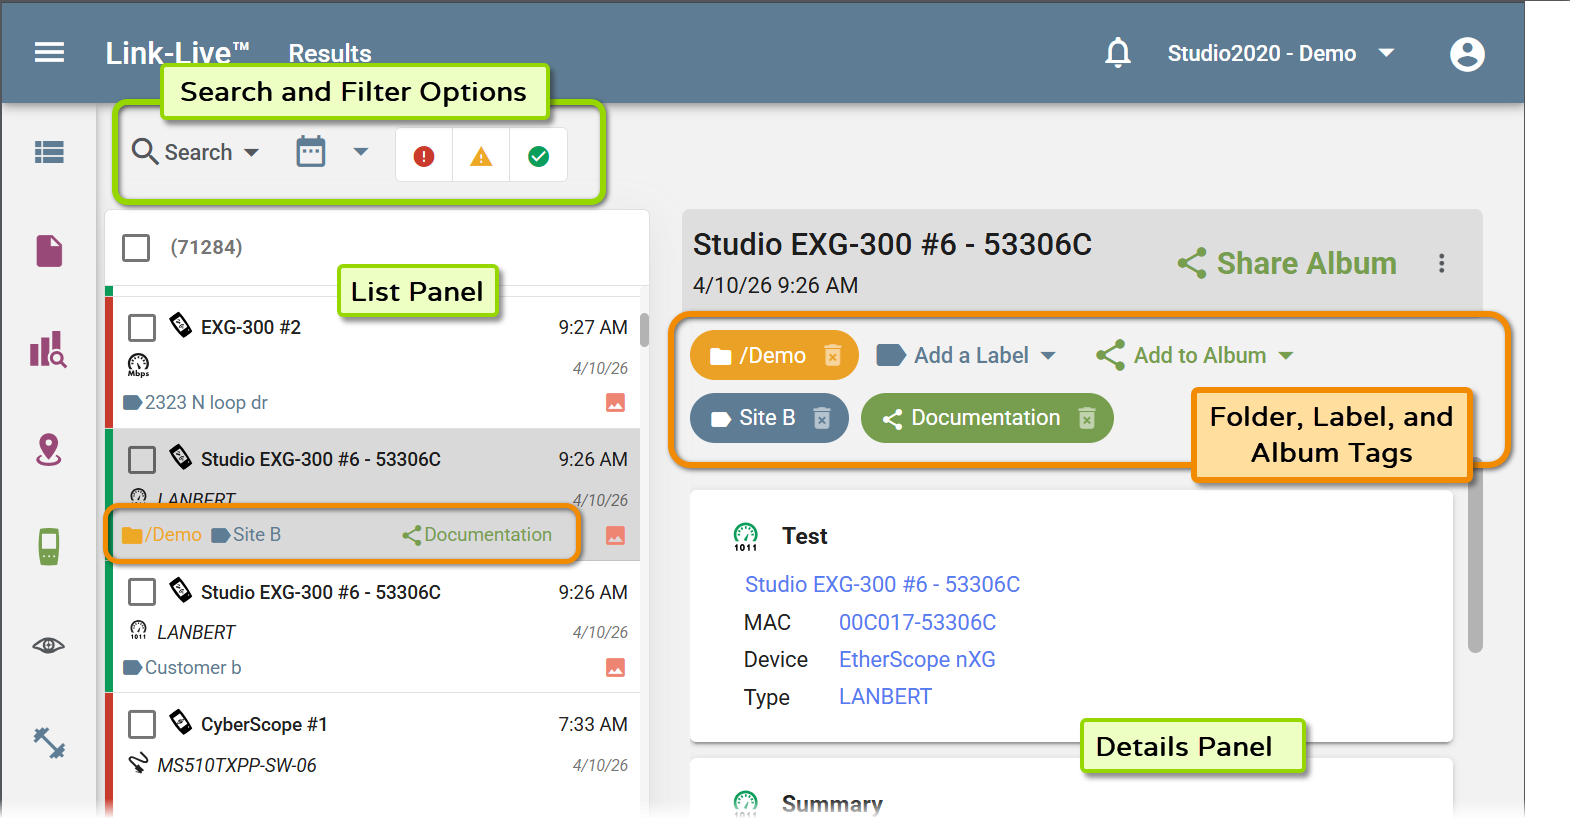
Note that the Search and Filter options above the List Panel control which items are shown in the list, while the Label, Folder, and Album tags are applied to the specific result or file that is being displayed in the Details Panel.
To remove any applied tag, click the trash icon to the right of its name.
Labels
Labels are blue tags you can apply to items to help categorize and filter them. Multiple labels can be applied to a single item. Labels can be applied to all content types, including units.
To apply a label, click Add a Label in the detail panel toolbar. Select an existing label from the dropdown, or type a new name to create one. The label tag appears on the item in both the detail panel and the list panel.
Auto-Labeling and Auto-Folder from a Unit
When applying a label to a unit, you can use special prefixes to automatically organize all future results uploaded by that unit:
-
A label name starting with + automatically applies that label to all records subsequently uploaded by the unit.
-
A label name starting with +/ automatically places records uploaded by the unit into a folder of that name instead.
Folders
Folders are orange path-based tags for organizing items. Folder paths support hierarchy: for example, a result can be placed in /Discovery/IngramMicro as a sub-folder of /Discovery.
To move an item to a folder, click Move to Folder in the detail panel toolbar. The dropdown lists existing folders with their names and item counts. Select a folder to move the item, or type a new folder name to create one. To create a sub-folder, type the full path including the slash separator (for example, /ParentFolder/SubFolder).
Folders are available for Results, Files, AirMapper surveys, Floor Plans, Analysis, and Monitoring. Units support labels only and cannot be placed in folders.
Applying Labels and Folders During Upload
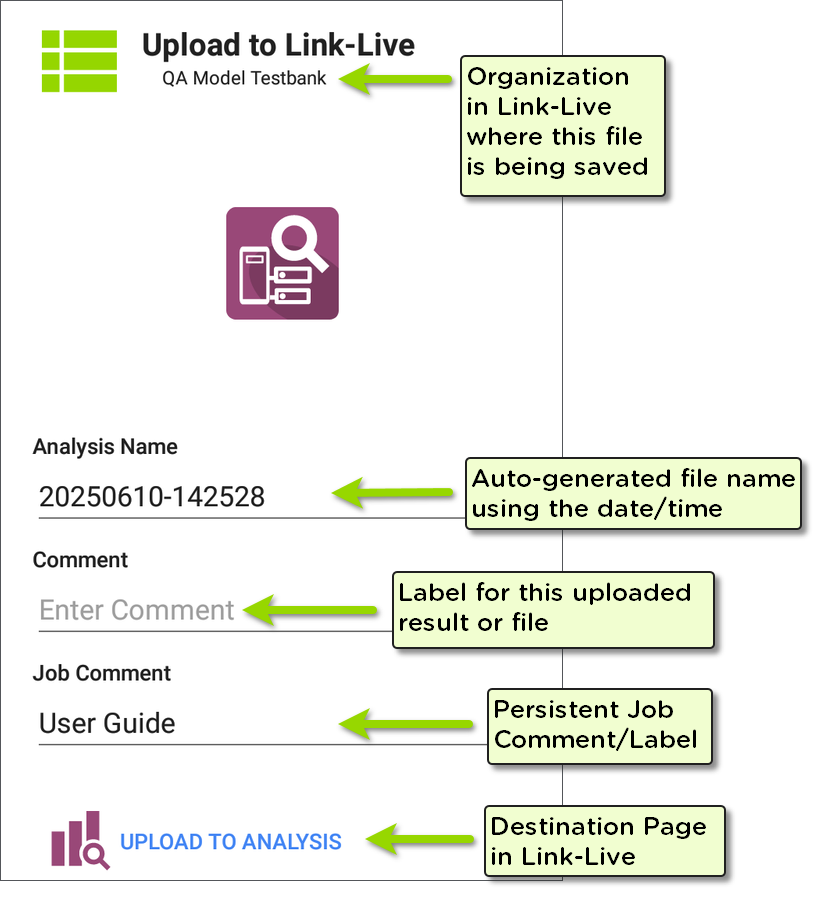
When uploading a result from a NetAlly tester, the Upload to Link-Live screen lets you rename the item and add organizational tags before it is sent to Link-Live.
-
Name field (Analysis Name, Result Name, etc.) – Auto-generated from the date and time. Edit this field to give the item a custom name in Link-Live.
-
Comment – Becomes a Label in Link-Live. To create a folder instead, start the comment with a forward slash: for example, /SiteName.
-
Job Comment – A persistent comment that applies as a label to all subsequent uploads from the tester until it is changed. Useful for tagging all results from a particular job or site.
The top of the screen shows the Link-Live organization where the item will be uploaded. The upload button at the bottom indicates the destination page in Link-Live.
Albums
Albums are green tags that group items into a named collection. Albums can contain results, files, AirMapper surveys, and analyses—they are not limited to images. Items can belong to multiple albums simultaneously.
To add an item to an album, click Add to Album in the detail panel toolbar. The dropdown lists existing albums with their names and item counts. Select an album to add the item, or type a new name to create one. Albums are created automatically the first time an item is added with that name.
Once added, a green album tag appears on the item in the detail panel. To remove an item from an album, click the trash icon on the album tag.
To see all albums in your organization, click Add to Album on any item. All existing org albums appear in the dropdown list.
Albums are available for Results, Files, AirMapper surveys, Analysis, and Monitoring. Units support labels only and cannot be added to albums.
Sharing an Album
The Share Album button generates a shareable link for an album. The shared album contains only the items that have been added to it. Recipients do not need a Link-Live account to view the shared content.
-
On any item that belongs to an album, click Share Album in the detail panel toolbar.

-
Enter a Title (optional): for example, a project or site name.
-
Select the album to share from the Select an album dropdown.
-
Choose a sharing mode:
-
Expire Mode – The link expires automatically after the selected duration. Choose from: 3 Days, 5 Days, 1 Week, 2 Weeks, 4 Weeks, or 3 Months.
-
Password Mode – The link requires a password to access.
-
-
Click Create Link. The dialog displays the shareable URL. Click Copy to clipboard to copy it.
NOTE: The Share Album button generates a link only—you must copy and send the link yourself. The recipient sees only the items that were explicitly added to that album.
Album Management
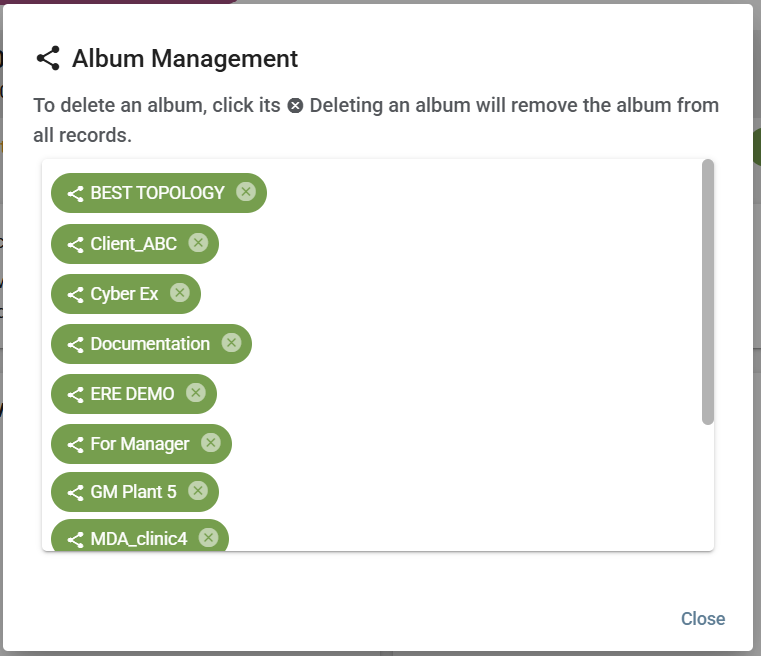
The Album Management option in the overflow menu (⋮) opens a dialog listing all albums in the organization.
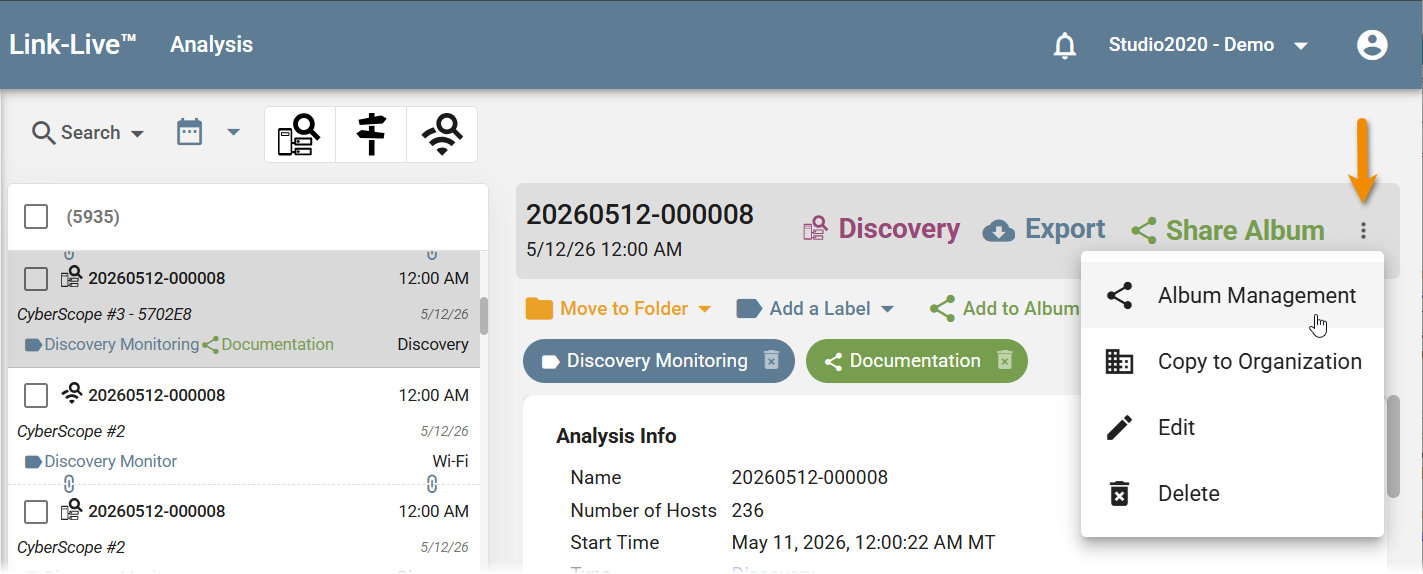
From this dialog, you can delete albums that are no longer needed.
Availability by Content Type
| Content Type | Label | Folder | Album |
|---|---|---|---|
| Results | Yes | Yes | Yes |
| Files | Yes | Yes | Yes |
| AirMapper surveys | Yes | Yes | Yes |
| Floor plans | Yes | Yes | No |
| Nmap resources | Yes | Yes | No |
| Analysis | Yes | Yes | Yes |
| Monitoring | Yes | Yes | Yes |
| Units | Yes | No | No |