 Units
Units
The Units page in Link-Live lists all NetAlly testers claimed to your organization. From here you can view unit status, manage settings, push profiles to units, and remotely connect to a tester.
Accessing Units
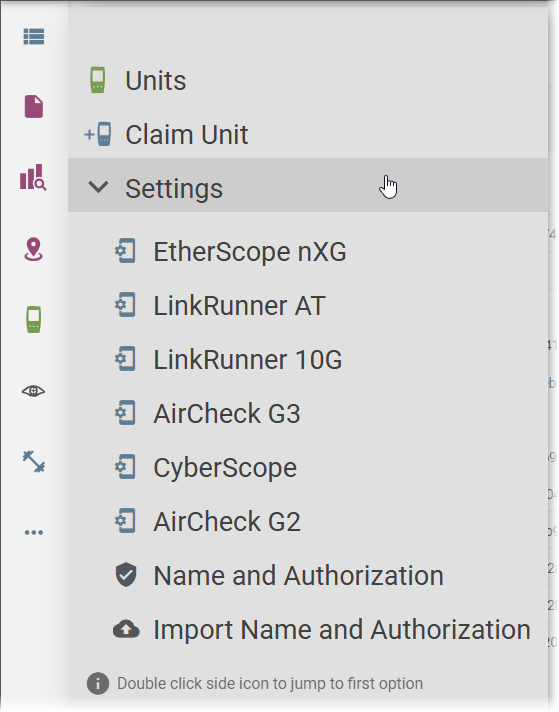
Click Units in the navigation drawer to open the Units list. A sub-menu provides quick access to additional options:
-
Claim Unit – Start the process of claiming a new tester to your organization.
-
Settings – Expand to access saved profile settings for each tester model: EtherScope nXG, LinkRunner AT, LinkRunner 10G, AirCheck G3, CyberScope, and AirCheck G2.
-
Name and Authorization – Manage device names and authorization classes.
-
Import Name and Authorization – Import name and authorization data from a file.
Tip: Double-click the Units icon in the navigation drawer to jump directly to the Units list.
Units List
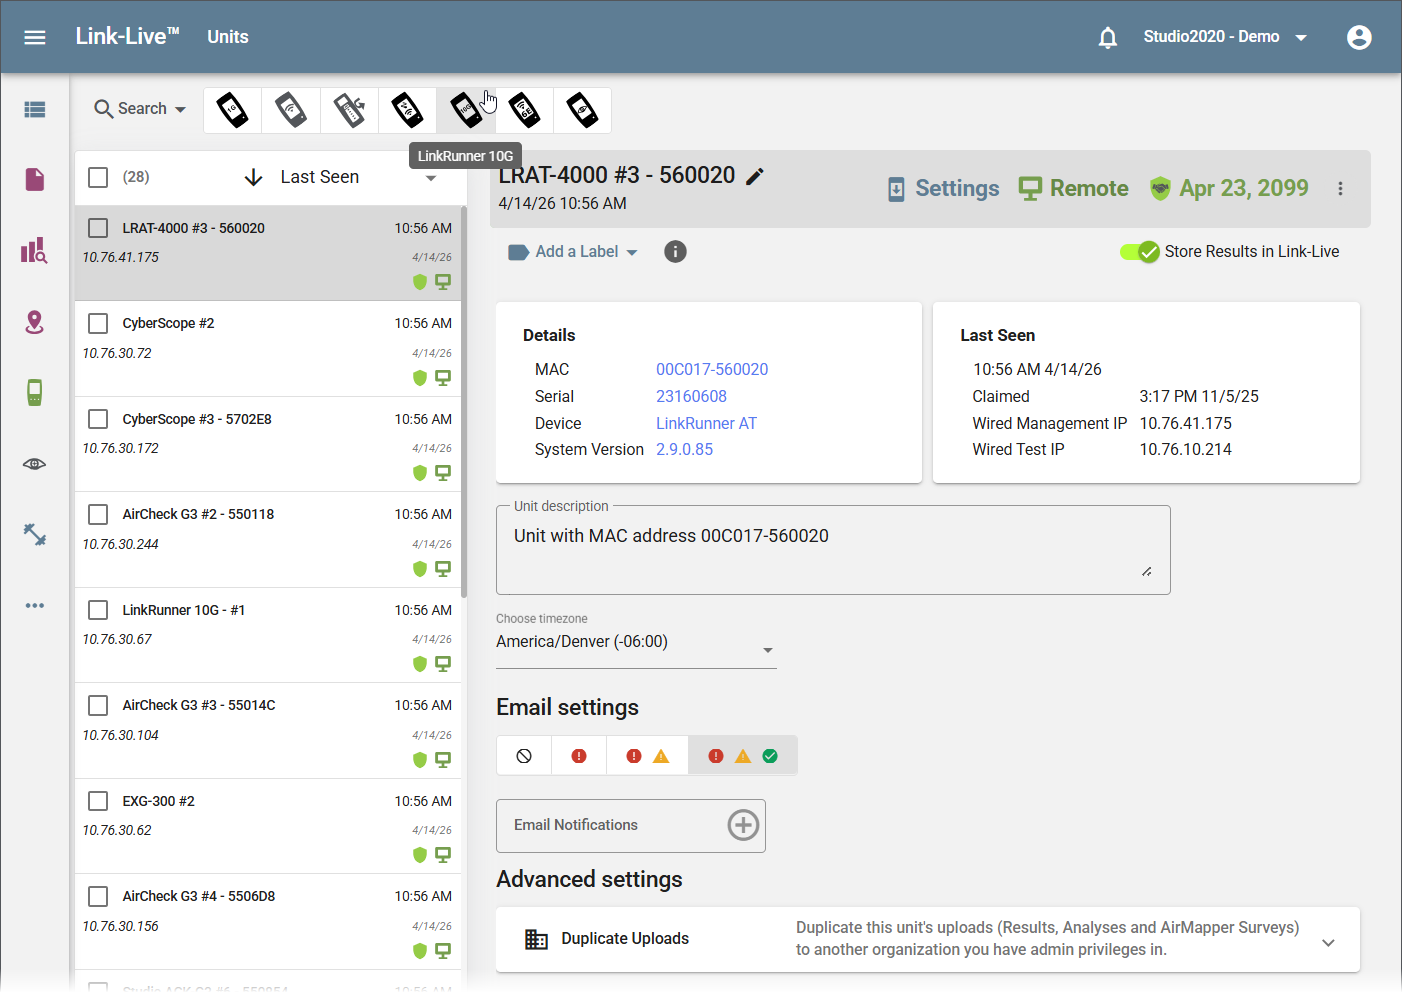
The Units list shows all testers claimed to your organization, with the total count at the top. Use the sort dropdown to sort by Last Seen or other criteria. Use the device type filter icons at the top of the list to show only a specific tester model.
Each entry in the list shows the unit name, IP address, and status icons. A green shield icon indicates an active AllyCare subscription. A monitor icon indicates the unit is available for remote connection.
Claiming a Unit
See Getting Started in Link-Live for the step-by-step claiming procedure.
Unit Detail Panel
Click a unit in the list to open its details. The unit name and description are displayed at the top and can be edited by clicking the pencil icon. The toolbar provides the following actions:
-
Settings – Open the settings and profile management page for this unit.
-
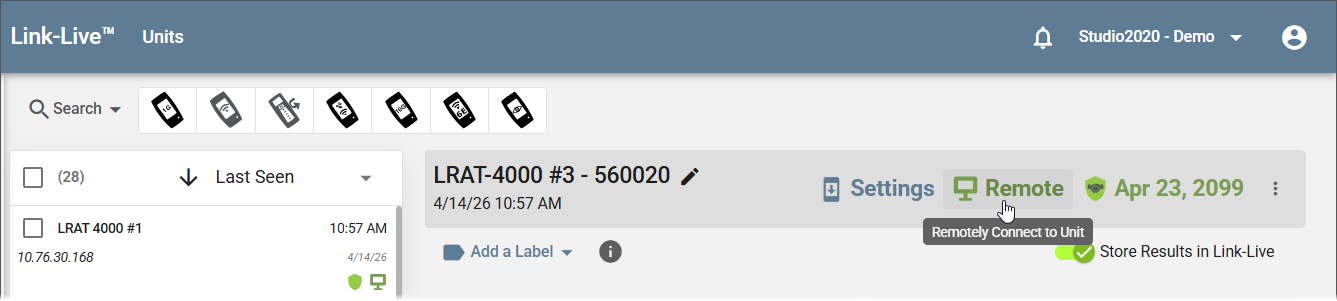
Remote – Remotely connect to the unit. See "Remote Control" below.
-
AllyCare expiration date – Displays the date the unit's AllyCare subscription expires.
-
Add a Label – Apply a label to the unit for organization.
-
Store Results in Link-Live – Toggle to control whether results from this unit are stored in Link-Live.

You can also apply labels and folders to results directly from the tester's Upload to Link-Live screen before uploading. See Labels, Folders, and Albums.
Details
The Details section shows key information about the tester:
- MAC address
- Serial number
- Device model
- System Version (firmware version)
Last Seen
The Last Seen section shows when the unit last connected to Link-Live, along with:
- Date and time last seen
- Channel
- Wired Management IP address
- Wired Test IP address
Timezone
Set the timezone for the unit to ensure accurate timestamps on uploaded results.
Email Settings
Configure email notifications for this unit. Use the four notification level buttons to choose which results trigger a notification:
- No notifications
- Errors only
- Errors and warnings
- All results
Use the Email Notifications field and its + button to add the email addresses that should receive notifications for this unit. Remove all addresses if you do not want test results emails sent.
Advanced Settings
The Advanced Settings section provides the following options:
-
Pair Unit – When a paired unit sends a result to Link-Live, this unit will also receive the results. Use the add button to select units to pair.
-
Duplicate Uploads – Duplicate this unit's uploads (Results, Analyses, and AirMapper Surveys) to another organization you have admin privileges in. See Organizations for more on setting up sub-organizations.
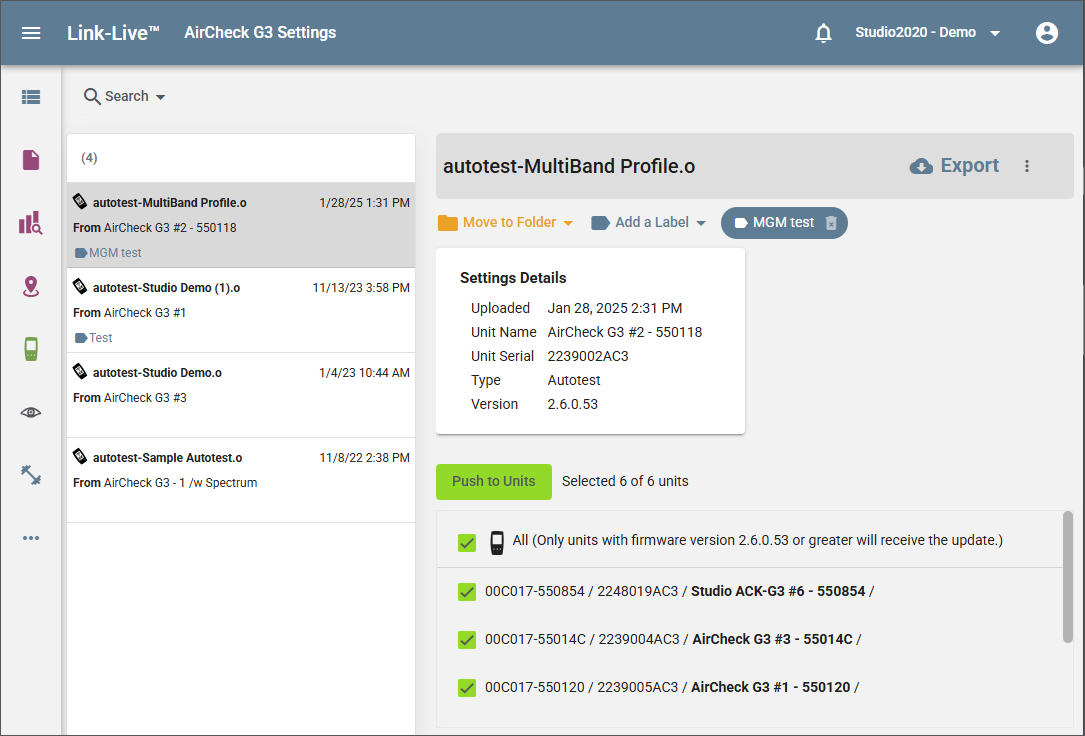
Unit Settings and Profiles
The Settings page for a unit displays saved settings, such as AutoTest profiles, that can be pushed to one or more testers. Select a profile to view its settings details, including name, creation date, serial, and type.
Click Push to unit to send the selected profile to your testers. You can select which units receive the profile. A note indicates the minimum firmware version required to receive the update.
Remote Control
NOTE: Remote Control requires an active AllyCare subscription.
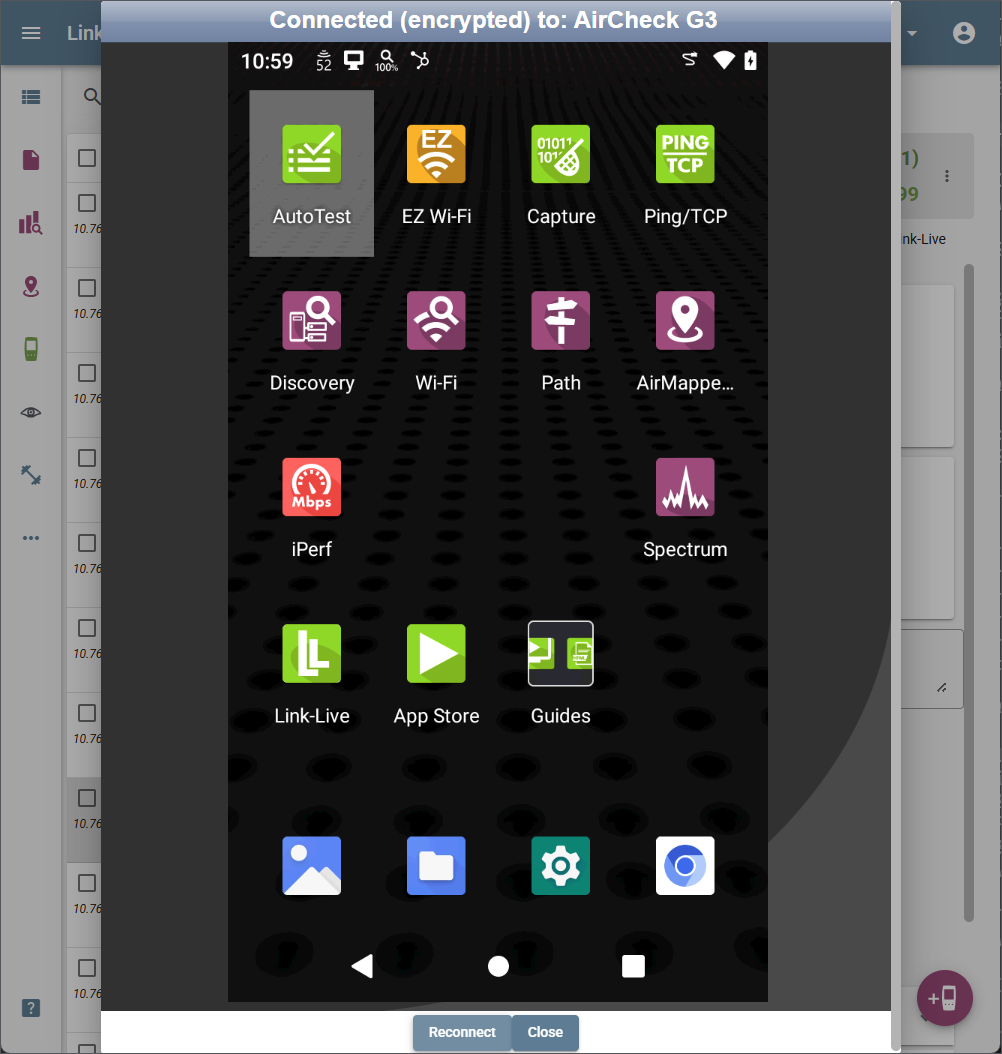
Click the Remote button in the unit detail panel to start an encrypted remote session with the tester.
Once connected, the tester's live interface is displayed in a window within Link-Live, showing the tester's home screen and all available apps. You can interact with the tester remotely as if you were holding it. Click Reconnect if the session drops, or Close to end the session.
Unclaiming a Unit
To remove a tester from your organization (for example, before transferring it to another team), you can unclaim it from either Link-Live or the tester itself.
From Link-Live: Go to Units, open the overflow menu  for the unit, and select Unclaim.
From the tester:
-
Open the navigation drawer and tap About.
-
Tap UNCLAIM.
Once unclaimed, the unit is removed from your organization and stops uploading results. Results that were already uploaded to Link-Live are preserved. Any results queued on the unit that had not yet been uploaded are deleted.
Software Updates
Software updates for NetAlly testers are performed over the air (OTA) using the Link-Live app on the tester. If your tester is claimed to Link-Live, follow these steps:
-
Open the Link-Live app from the tester's home screen.
-
Touch the menu icon or swipe right to open the navigation drawer.
-
Touch Software Update. The Software Update screen displays the version number of any available updates.
-
Touch Download + Install to update the software.
When finished, the tester restarts.