Importing a Certificate
Certificate files can be imported from either an inserted storage device (USB
-
Make the certificate file available on your LR 10G unit by saving it to a USB drive
-
To run an AutoTest Wired Profile using 802.1X with certificate authentication, set up the profile with the following 802.1X test settings:
-
802.1X: Enabled
-
EAP Type: EAP TLS, PEAP TLS, or TTLS EAP TLS
-
-
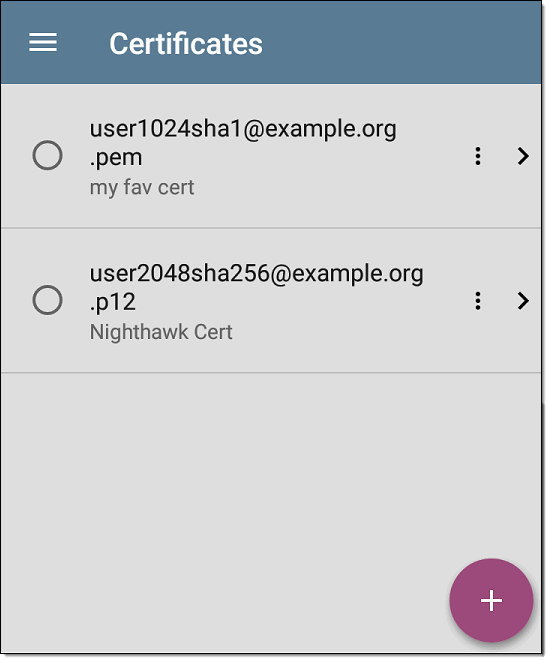
In AutoTest > Wired Connection settings, tap the Certificate setting to open the Certificates screen.
-
Tap the floating action button (FAB)
 to open the Import Certificate dialog box.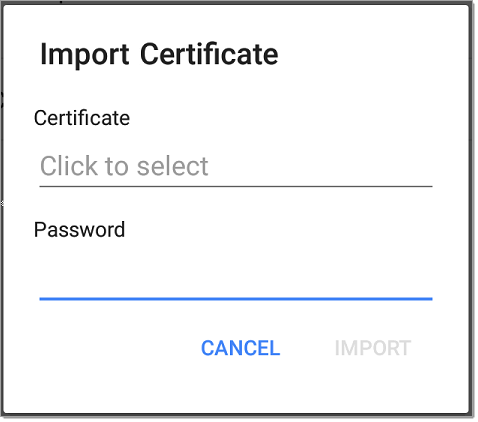
-
Tap Click to select beneath the Certificate field to open the Files app.
-
In the Files app, navigate to the folder or storage device where your certificate file is saved.
-
Tap the menu button
 to open the left-side navigation drawer.
 -
Navigate to the required certificate file, and tap to select it.
After you select the file, the Files app closes, and the Import Certificate dialog displays the chosen certificate file.
-
Enter the certificate's password if it is password protected.
-
Tap IMPORT.
-
If desired, tap the fields to edit the Name and Description of the certificate. The name defaults to the certificate file name.
-
Tap the back button
 to return to the Certificates list screen. The newly added certificate appears selected in the list.
 -
Tap the back button
to return to the Connection settings.
After running the AutoTest, you can review the Connect Log from the