Wi-Fi App List Screens
To switch between the different Wi-Fi app screens, tap the menu icon ![]() (or swipe right) to open the left-side navigation drawer.
(or swipe right) to open the left-side navigation drawer.
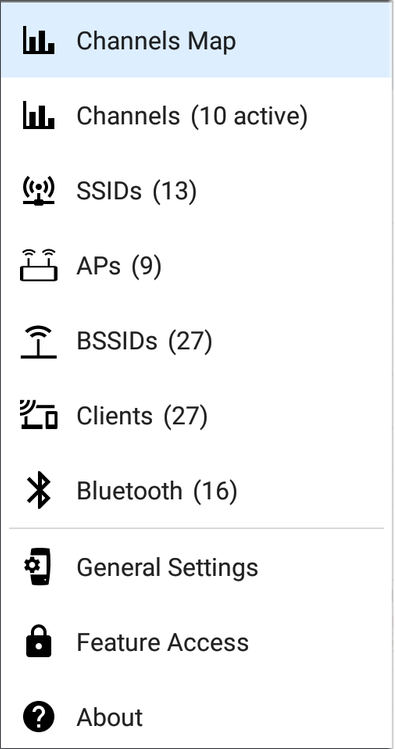
The Wi-Fi app's navigation drawer displays a real-time count (in parentheses) of each wireless component EtherScope has detected. Tap an option to open the corresponding screen.
NOTE: The General Settings for Wi-Fi control which channels and bands are scanned to populate the Wi-Fi screens. See the General Settings topic for more explanation.
In this Topic
Wi-Fi App List Screens Overview
Refreshing Wi-Fi and Discovery
Setting Authorizations for Multiple BSSIDs or Clients
Uploading Results to Link-Live
Wi-Fi App List Screens Overview
The Wi-Fi app screens, except for Channels Map, display a list of discovered items, much like a Discovery App list screen. You can Filter  and Sort
  the list by different characteristics and tap a network component's card to view its details.
The example image below shows the APs screen with common Wi-Fi app functions:

As with AutoTest and other EtherScope screens, the icons in Wi-Fi analysis change color to indicate a Warning or Failure condition. The app also displays icons in Blue to indicate Problem-related information that does not constitute a warning or failure, and Green to indicate that a previous Problem has been resolved.
NOTE: To adjust the Problem Settings, access them from the Discovery app's left-side navigation drawer. Problem Settings in the Discovery app are also applied to the Wi-Fi Analysis app.
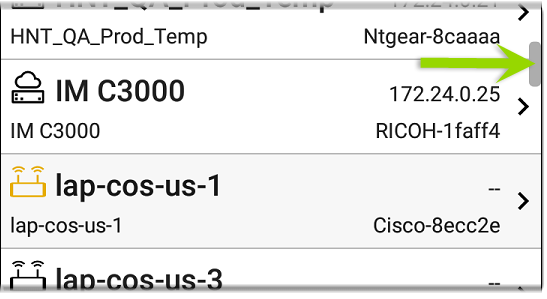
The Wi-Fi list screens, and other app screens with long lists, support fast scrolling. Touch and drag the scrollbar handle to the right of the list to scroll quickly up and down.
Wi-Fi List Cards
The information displayed on each card varies depending on the selected Sort characteristic and the data the EtherScope was able to discover. For example, a card on the Channels list screen displays the channel number, frequency, connected APs, and utilization.
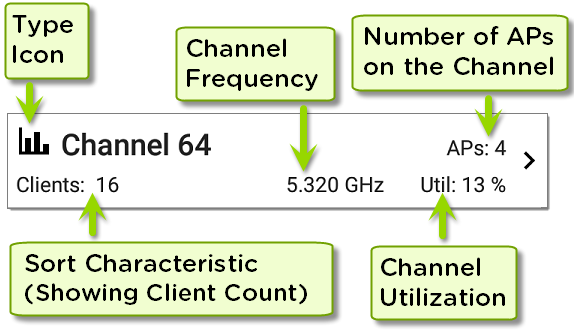
The lower left field displays the characteristic by which the list screen is currently sorted. In the image above, the Channels list is sorted by Client Count.
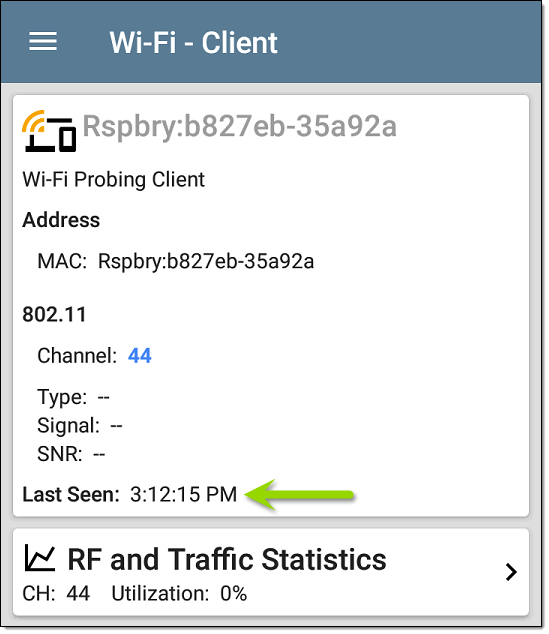
If a device is grayed out, the EtherScope no longer detects a signal from it. The client card shown below indicates that the "Rspbry" client cannot be detected currently.

The time the device was Last Seen, meaning last detected by the EtherScope, is shown on the device's Details screen.
 Searching in the Wi-Fi App
The Search feature is available on the SSIDs, APs, BSSIDs, Clients, Channels, and Bluetooth list screens.
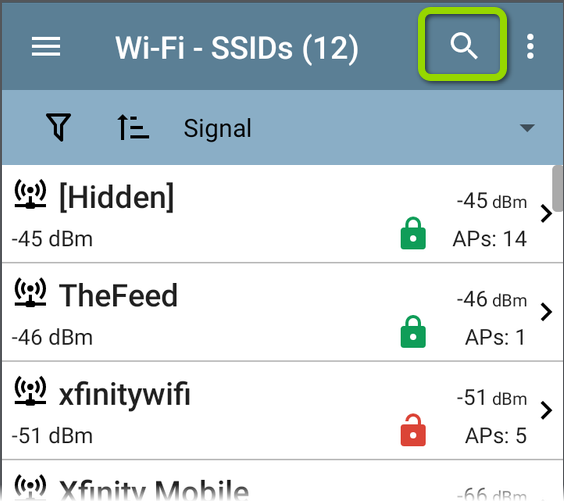
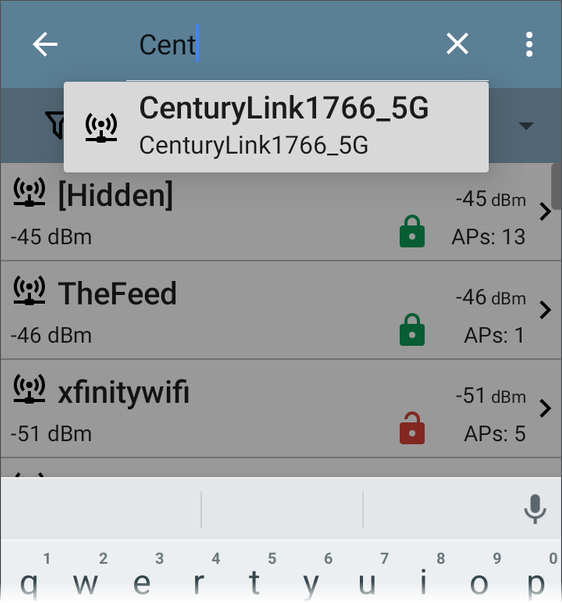
Tap the search icon to search for numbers and text in the Wi-Fi App list screens to find specific names, addresses, and channel numbers.
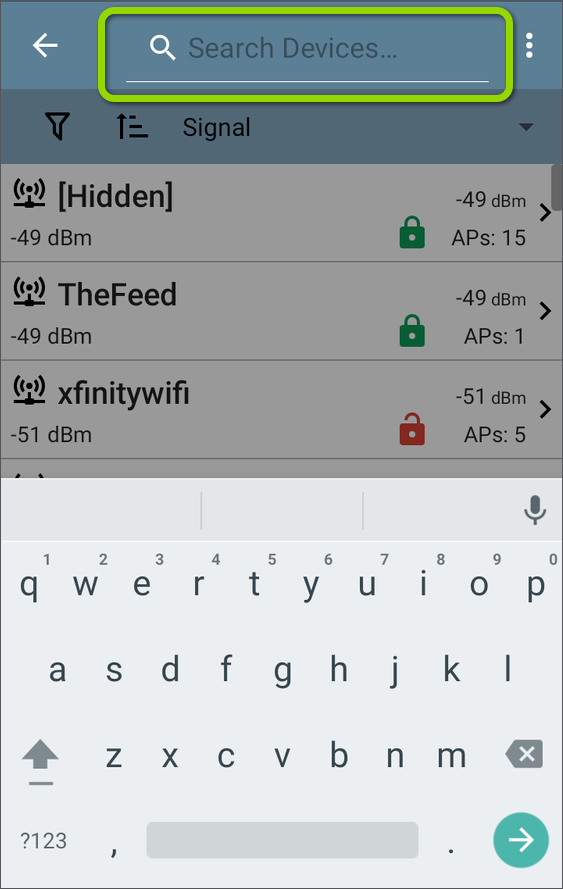
The search function is dynamic and displays current matches as you enter characters.
Filtering in the Wi-Fi App
Each Wi-Fi Analysis screen has different Filter options that are appropriate for the network component type you are analyzing.
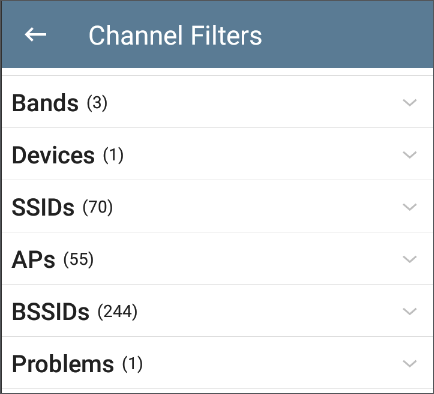
NOTE: The Channels, AP, BSSID, and Client screens include the ability to filter on Problems.
Tap the filter button near the top left of the Wi-Fi screens to set filters that control which network components are displayed. You can also filter the Channels Map > Overlap screen, as shown below:
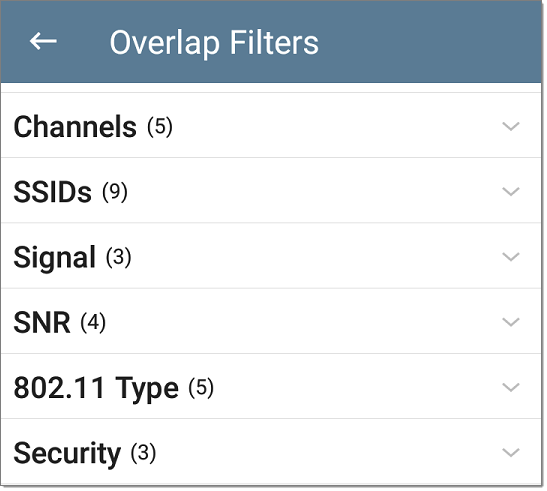
The number in parentheses shows how many active network characteristics are detected for each category. The example screen above shows (5) active Channels, (9) SSIDs, and so on.
Tap a category to select filters by tapping the checkboxes or radio buttons.
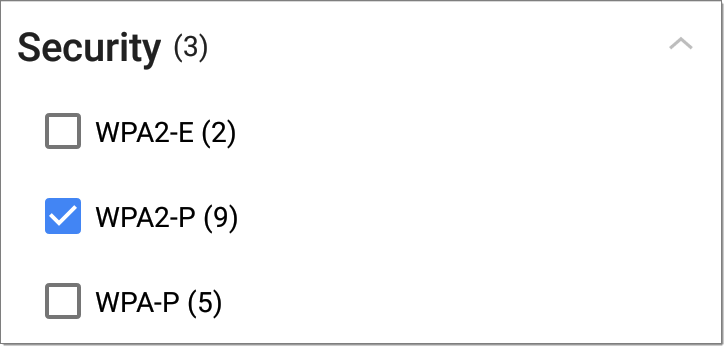
Under each category, the number of discovered APs is shown for each characteristic. In the example above, there are (3) Security types detected and (9) APs using the WPA2-P Security type.
In the following example, the Overlap screen shows only those APs that fall under your chosen filter parameters.
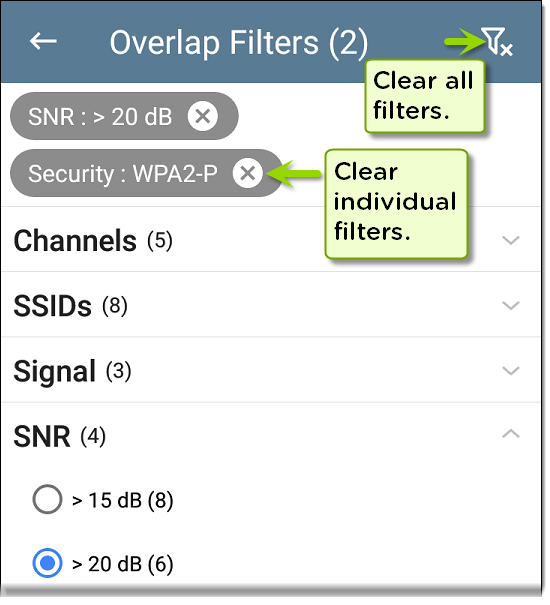
When filters are selected, those active filters are displayed at the top of the Filters screen.
-
Tap the × button to the right of each filter to clear it.
-
Tap the clear filter icon at the top right to clear all filters.
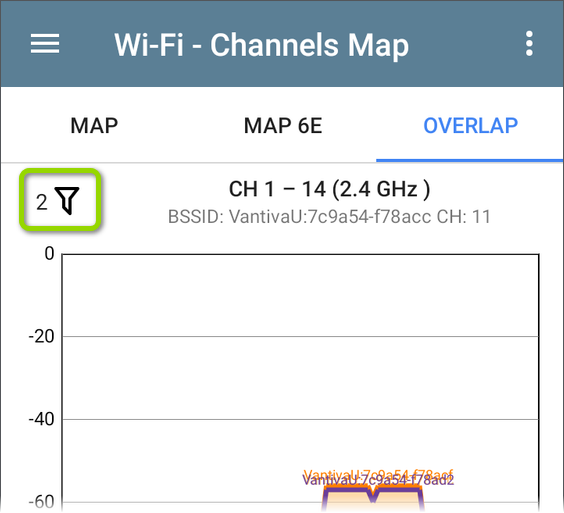
Back on the Overlap screen, the number of active filters displays to the left of the filter icon, like this:  .
.
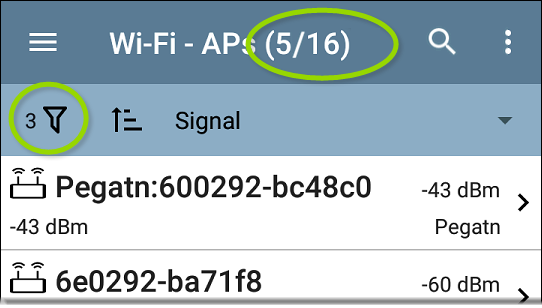
If the screen is a list, like the APs screen below, the screen title shows the number of filtered devices out of the total discovered devices (5 filtered devices out of 16 total).
Sorting in the Wi-Fi App
Tap the Sort bar or down arrow to open the Sort drop-down menu. Each list screen supports relevant Sort options based on what you are viewing. The APs screen Sort options are shown below as an example.
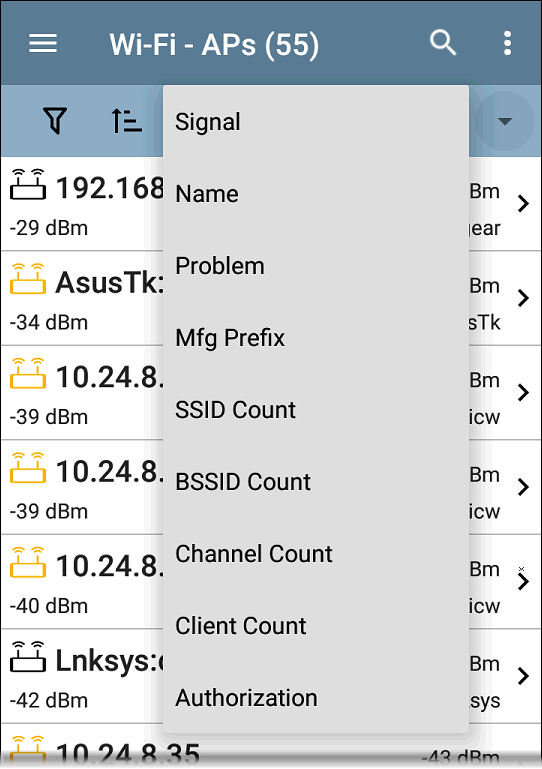
Select a Sort option to order the list based on your selected characteristic.
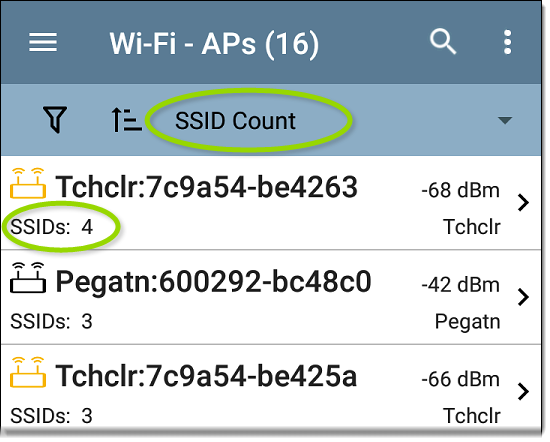
The selected Sort option displays in the Sort bar above the list, and the sort characteristic for each item is shown under the type icon and name. In the image above, the discovered APs are sorted by SSID Count, which is shown below each AP icon.
Tap the sort order icon to switch the sort order between normal and reverse order.
Wireless devices and IDs are sorted in groups. Those with resolved names appear at the top (in normal order), and then devices with only IPv4, IPv6, and MAC addresses appear below, respectively. Reversing the normal sort order reverses the devices within the groups but does not change the order of the groups.
Refreshing Wi-Fi and Discovery
Tap the action overflow icon  at the top right of the screen in any of the Wi-Fi screens (Channels Map, Channels, SSID, APs, BSSIDs, or Clients), and select Refresh Wi-Fi to clear and repopulate the Wi-Fi app screens with data. You can also Refresh Discovery to clear all discovered devices, including Wi-Fi.
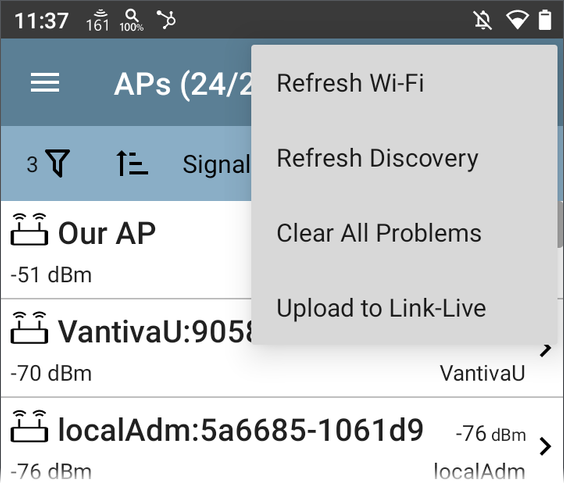
Clearing All Problems
Tap the action overflow icon at the top right of the screen in any of the Wi-Fi screens (Channels Map, Channels, SSID, APs, BSSIDs, or Clients), and tap Clear All Problems to clear all detected problems on all Wi-Fi lists.
See Wi-Fi Problems Screen for more information.
Setting Authorizations for Multiple BSSIDs or Clients
From the Wi-Fi app's list screens of BSSIDs or Clients, you can assign authorizations to batches of BSSIDs and MAC addresses.
NOTE: Also, see Device Naming and Authorization for additional details and instructions for assigning Authorizations.
-
Navigate to the Wi-Fi app from the Home screen or another NetAlly app, like Discovery.
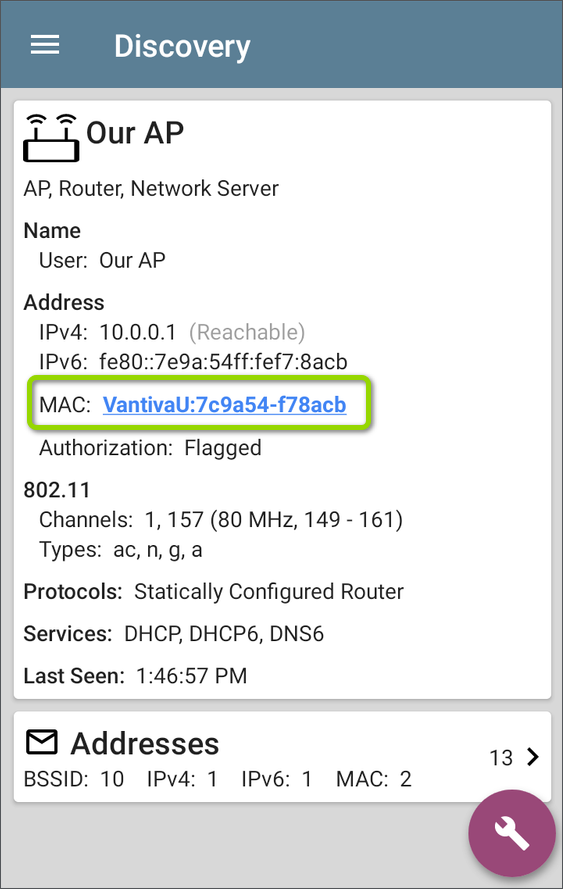
Clicking a blue hyperlinked name for a Wi-Fi device will open the Wi-Fi app, focused on that device.
-
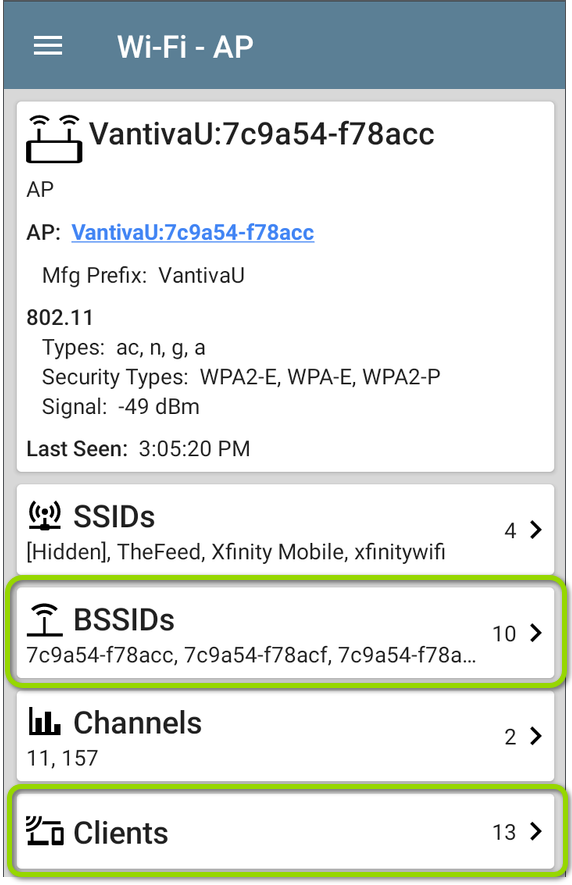
Open the BSSIDs or Clients list, and filter for the addresses you want to assign an Authorization status. Here are two example paths to filtered BSSID or Client lists:
-
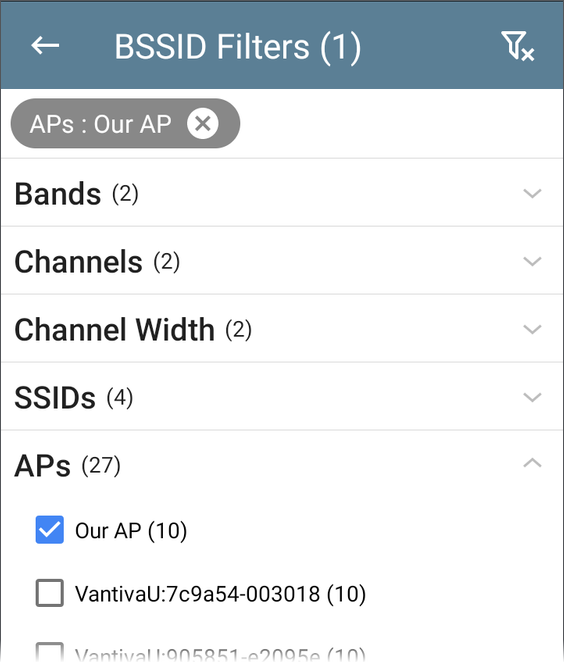
Select an AP, SSID, or Channel for which you want to Authorize all BSSIDs or Clients. Open the associated list from its details screen:
-
Open the BSSIDs or Clients list from the Wi-Fi app menu and filter for whichever characteristics apply to the addresses for which you want to set a status.
-
-
From the BSSID list screen or Clients list screen, tap the action overflow icon
at the top right and select Set Authorization.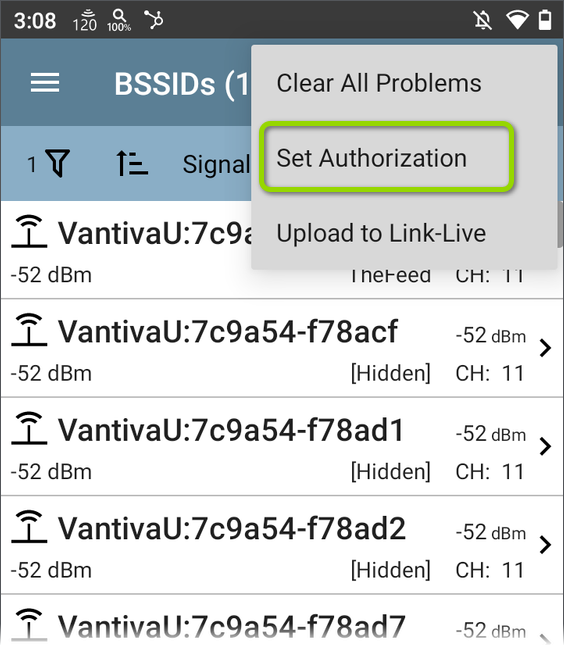
-
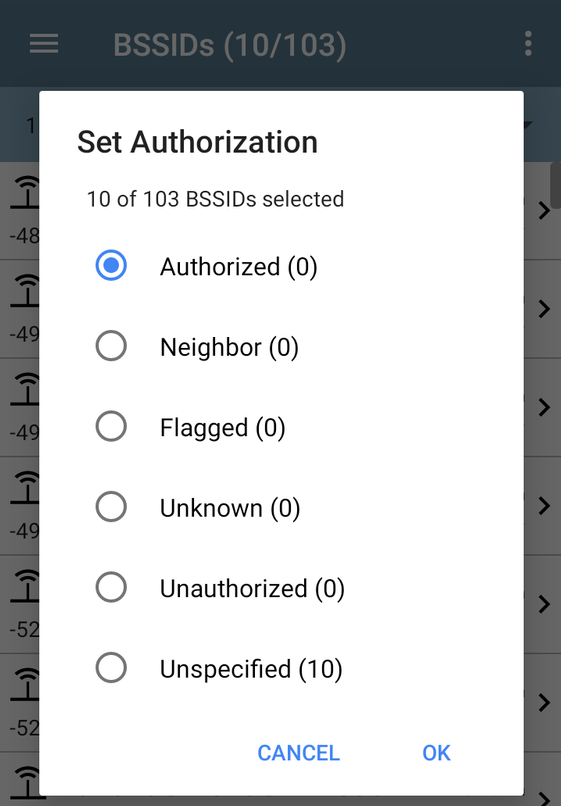
The Set Authorization dialog shows how these addresses are currently categorized and the number in each category. Select your desired Authorization status:
-
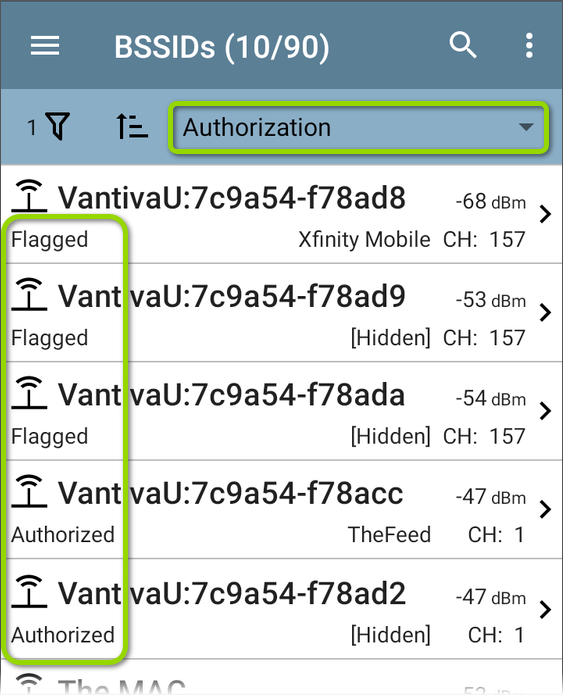
Sort by Authorization back on the list screen to view each address's status.
Uploading Results to Link-Live
Tap the action overflow icon at the top right of the screen in any of the Wi-Fi screens (Channels Map, Channels, SSID, APs, BSSIDs, or Clients), and tap Upload to Link-Live to send the current Wi-Fi results to the Analysis page  on Link-Live.com.
NOTE: Discovery app results automatically upload with the Wi-Fi results.
See the Link-Live chapter for more information.