Buttons and Ports
Button and port functions on your LR 10G tester are described below.

| Feature | Description |
|---|---|
|
Fiber Port 1G/10GBASE-X |
Connects to an SFP adapter and fiber cable for network testing. NOTE: 100FX SFPs are not supported. |
|
RJ-45 LAN Port |
Connects to a copper Ethernet cable for network testing Supports PoE (with compatible unit hardware) |
|
Transmit LEDs |
Green LED lit: Linked Yellow LED flashing: Activity |
|
USB Type-A Port |
Connects to any USB device |
|
RJ-45 Cable Test and Management Port |
Connects to an Ethernet cable for patch cable testing and unit management |
|
USB Type-C |
Connects to a USB Type-C connector for file transfer and to the included AC adapter for charging the tester |
|
Microphone |
Allows voice input |
|
Camera and Flashlight |
Captures images and acts as a flashlight |
|
Micro SD Card Slot |
Used for removable storage expansion (See Inserting a Micro SD Card below.) |
|
Volume Buttons |
Increase or decrease the audio volume |
|
Speaker |
Produces audio |
|
Power Button |
Press and hold to display menu for Power off or Restart Green LED: tester is powered on Red LED: tester is charging |
See Test and Management Ports for detailed explanations of the port functions.
See Updating Software for requirements on updating system software.
Refer to the product Specifications if needed.
Inserting a Micro SD Card
A Micro SD card must be inserted with the metal contacts facing the front (towards the touchscreen) of the tester, as shown below.
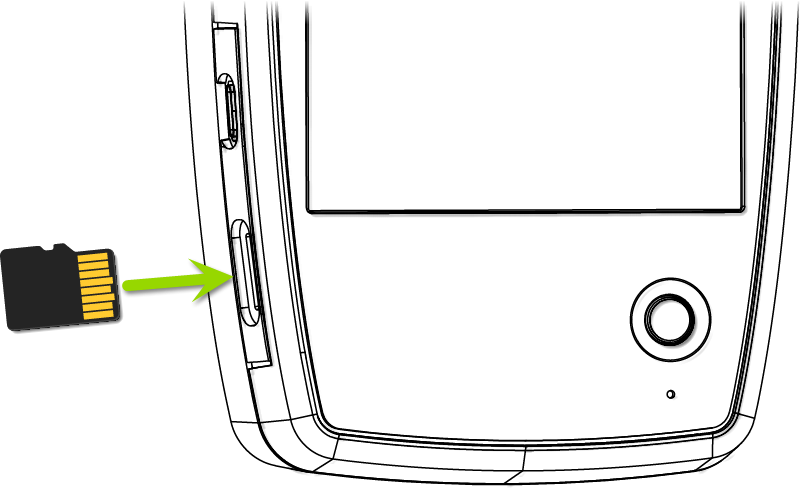
The card should slide in easily when properly oriented. You may need a paperclip or thumbnail to carefully push the SD card in far enough to engage the spring mechanism for insertion and removal.
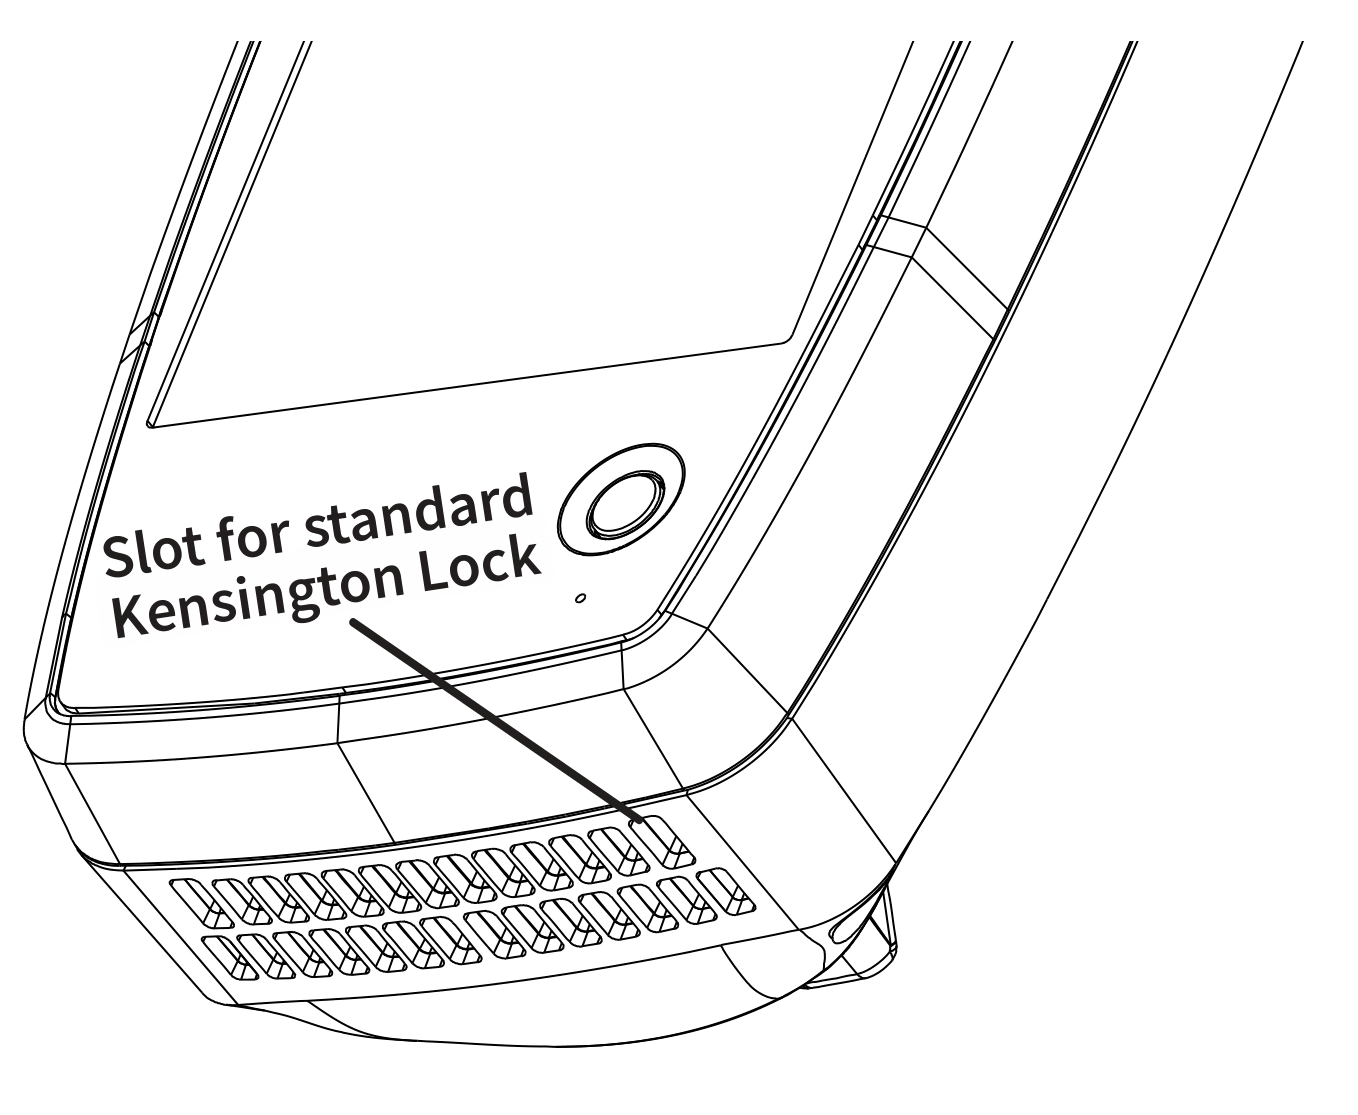
Using a Kensington Lock
The slot for a standard Kensington lock is the right front vent hole on the bottom of the tester, as shown below.