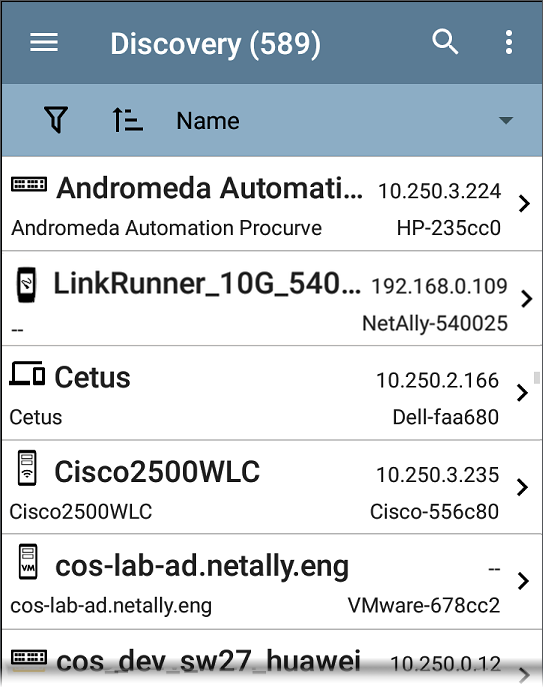
Main Discovery List Screen
The main Discovery screen lists all the devices the LR 10G has discovered.
In this Topic
Security Auditing – Batch Authorization
Uploading Results to Link-Live
Like in AutoTest and other LR 10G screens, the icons in Discovery change color to indicate a Warning or Failure condition. Discovery also displays device icons in Blue to indicate Problem-related information that does not constitute a warning or failure, and Green to indicate that a previous Problem has been resolved. (See the Problem Settings to adjust enabled Problems and thresholds.)
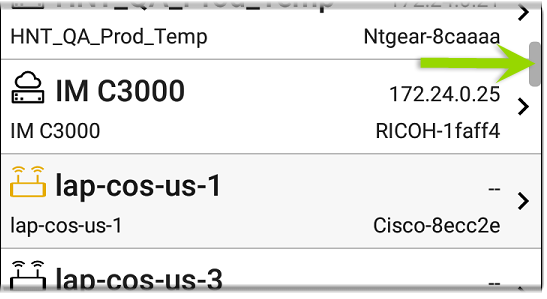
The Discovery screen, and other app screens with long lists, supports fast scrolling. Touch and drag the scrollbar handle to the right of the list to scroll quickly up and down.
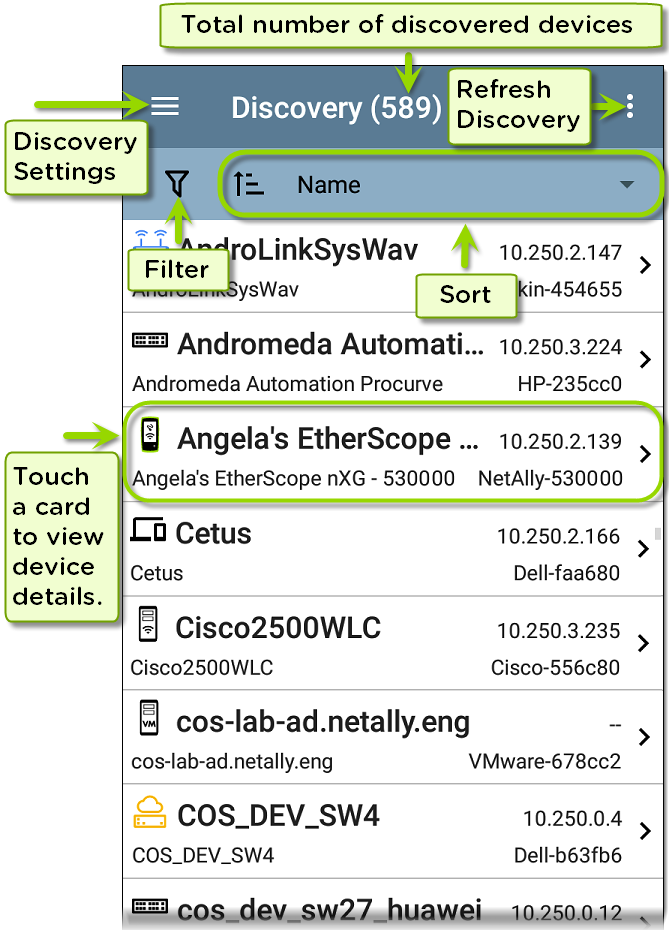
From the main Discovery screen, you can filter and sort the listed devices, open the left side navigation drawer to configure settings, and tap a device's card to view its details.
Discovery List Cards
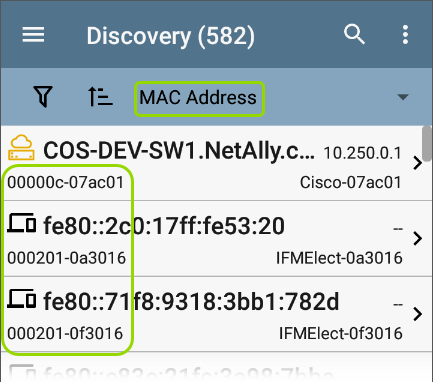
The information displayed on each device card varies depending on the selected Sort element and the data the LR 10G was able to discover.
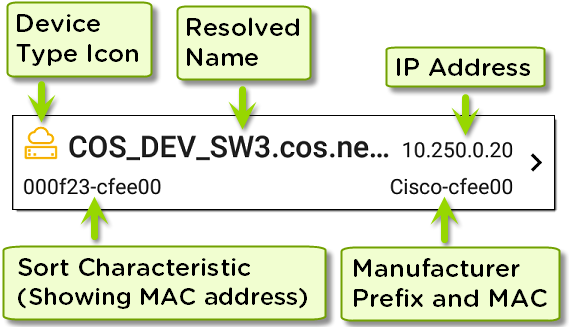
The lower left field displays the characteristic by which the Discovery list is currently sorted. In the image above, the list is sorted by MAC address. See Discovery Sorts in this topic for more about sorting.
 Searching the Discovery List
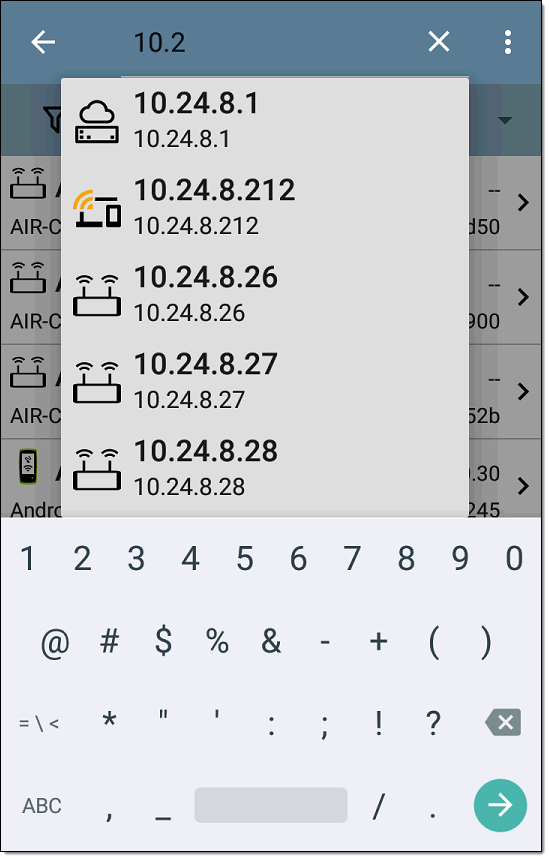
The main Discovery screen offers a search feature. Tap the search icon at the top of the screen to search discovered devices.
 Filtering the Discovery List
Tap the filter button near the top left of the main Discovery screen to set filters that control which devices are displayed in the list.
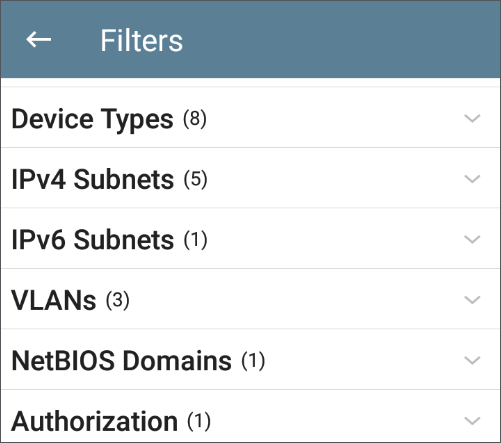
The Filters screen displays the number of devices or domains discovered for each category. Tap a category name to select filters by checking the boxes. The main Discovery screen shows only those devices or IDs that fall under your chosen filter parameters.
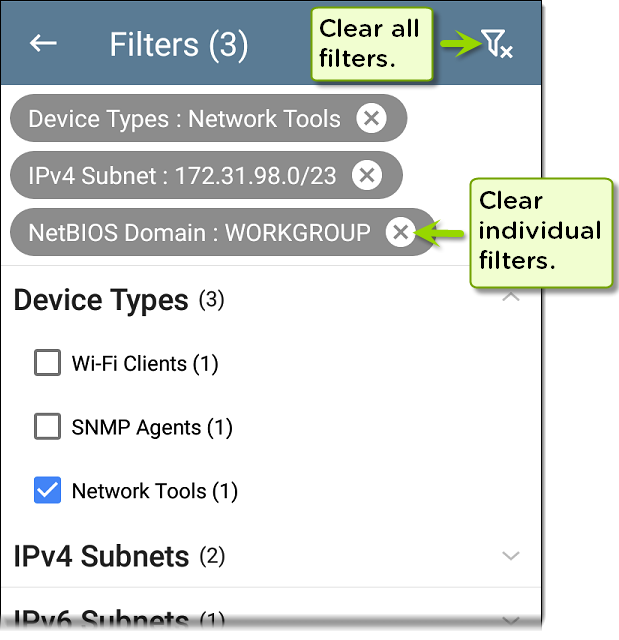
When filters are selected, those active filters are displayed at the top of the Filters screen.
-
Tap the × button to the right of each filter to clear it.
-
Tap the clear filter icon at the top right to clear all filters.
After you select a filter, the Filters screen displays results filtered for that characteristic. For example, in the image above, the user has selected the Network Tools device type. As a result, only those subnets, addresses, etc., with a discovered Network Tool remain selectable in the filters list.
Back on the main Discovery screen, the screen title shows the number of filtered devices out of the total discovered devices (in the image above, 152 filtered devices out of 1308 total).
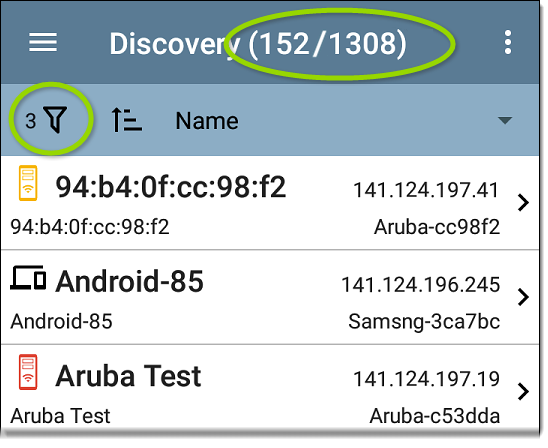
The number of active filters displays to the left of the filter icon (3 active filters in the image above).
Sorting the Discovery List
Tap the Sort bar or down arrow to open the Sort drop-down menu.
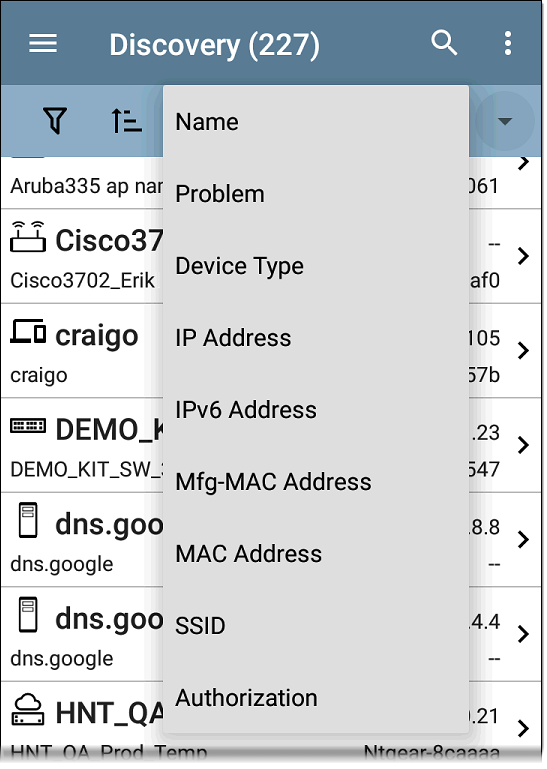
Select a Sort option to order the devices based on your selected characteristic.
The selected Sort option displays in the Sort bar above the device list, and the sort characteristic for each device is shown under the device type icon.
Tap the sort order icon  to switch the sort order between normal and reverse order.
Devices are sorted in groups. Those with resolved names appear at the top (in normal order), and then devices with only IPv4, IPv6, and MAC addresses appear below, respectively. Reversing the normal sort order reverses the devices within the groups but does not change the order of the groups.
Security Auditing – Batch Authorization
Batch authorization lets you extend filtering to organize devices into the following security categories:
- Authorized: For devices approved for use on your network
- Neighbor: For devices owned and controlled by neighboring organizations
- Flagged: To give visibility to a specific device
- Unknown: For devices that have not been identified or classified
- Unauthorized: For devices that should not be on the network and may present a security risk
- Unspecified: Default unassigned Authorization status
Once categorized, it is simple to immediately identify any new devices on the network by filtering according to Authorization type. New devices are identified as Unspecified.
NOTE: See Device Naming and Authorization for more information on the Authorization feature.
To use the batch authorization feature, create a filter that identifies the devices you want to categorize. For example, you could filter on
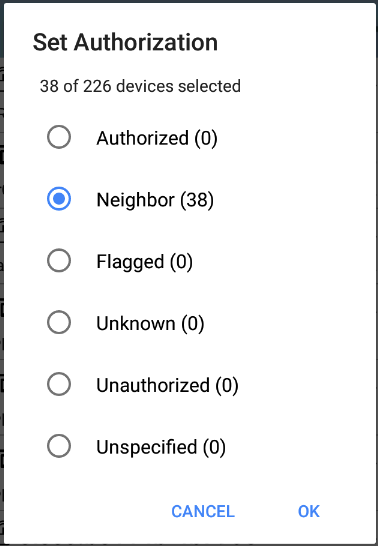
Select Set Authorization to see how these devices are currently categorized and the number of devices in each category. In the example below, 38 devices belong to other offices and have an Unspecified authorization.
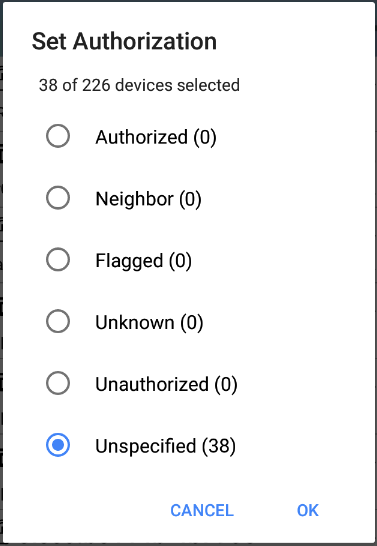
NOTE: The initial selection on this screen defaults to the category with the highest count. If other categories have non-zero counts, select OK to change the authorization settings for all devices to the selected category.
Select the appropriate security category. To continue the example above, you can select Neighbor, and then tap the OK button to identify the Unspecified devices from other offices as Neighbor.
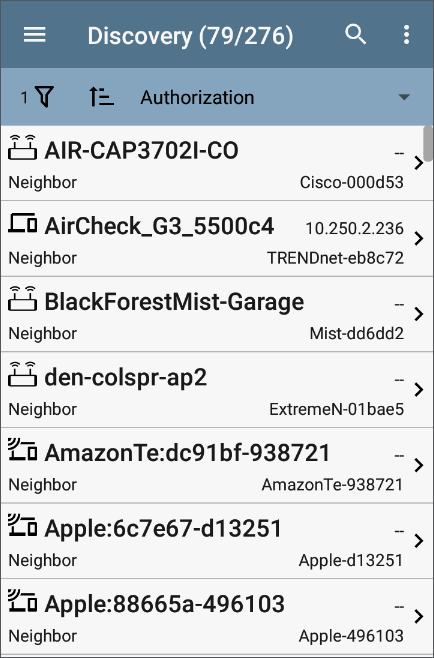
You can filter the list by tapping the Filter icon , tapping Authorization, and then tapping Neighbor to show only the Neighbor devices. You can also sort the list by Authorization to display the discovered devices with the Neighbor category clearly identified.
NOTE: Batch Authorization operates on the default MAC address of a device. If a device has multiple MACs, authorization is set only on the default MAC address. Devices that do not have a discovered MAC address, such as unknown switches and off-net devices, cannot have an authorization setting.
Refreshing Discovery
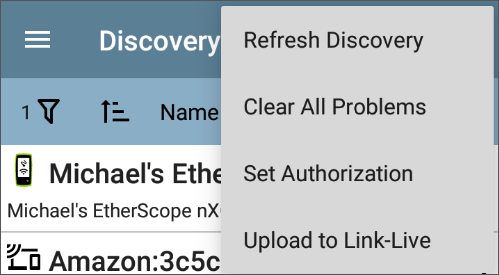
Tap the action overflow icon  at the top right of the main Discovery screen, and select Refresh Discovery to refresh the active Discovery process.
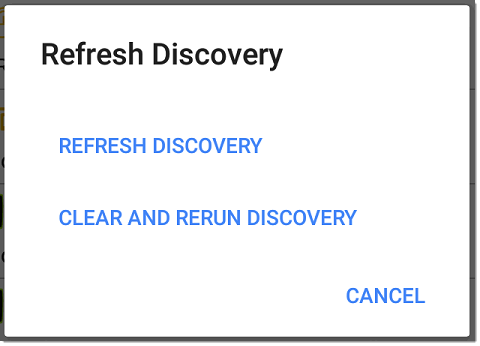
REFRESH DISCOVERY restarts the active discovery process without clearing the already discovered devices.
CLEAR AND RERUN DISCOVERY clears the accumulated results and restarts the discovery process.
Uploading Results to Link-Live
Tap the action overflow icon at the top right of the main Discovery screen, and select Upload to Link-Live to send the current Discovery results to the Analysis page  on Link-Live.com.
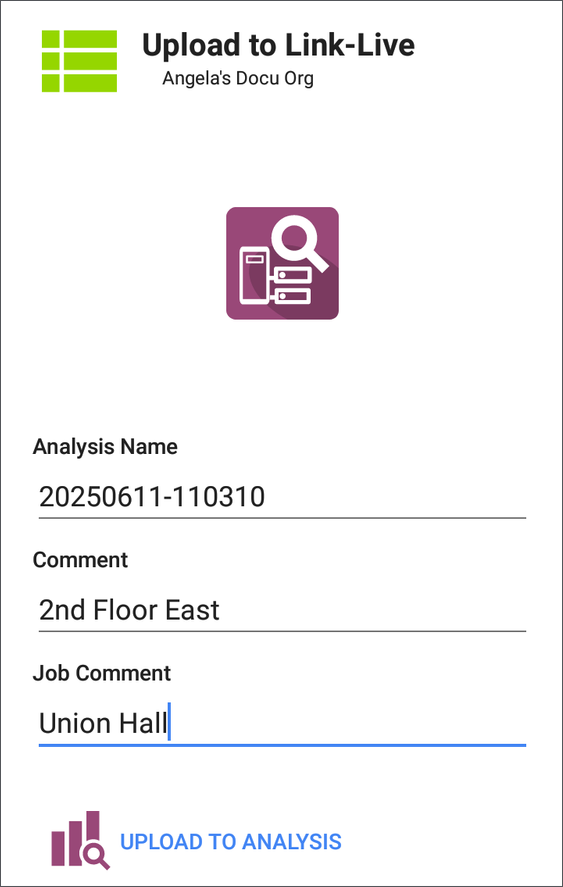
See the Link-Live chapter for more information.