Navigation Drawer
Many system apps, including the NetAlly test apps, contain additional settings, tools, and information in a "navigation drawer" that slides out from the left side of the screen.
To open the navigation drawer:
-
Tap the menu icon
 at the top left of one of the testing application screens.
 -
Touch and drag (swipe) to the right from the very left side of the app screens.
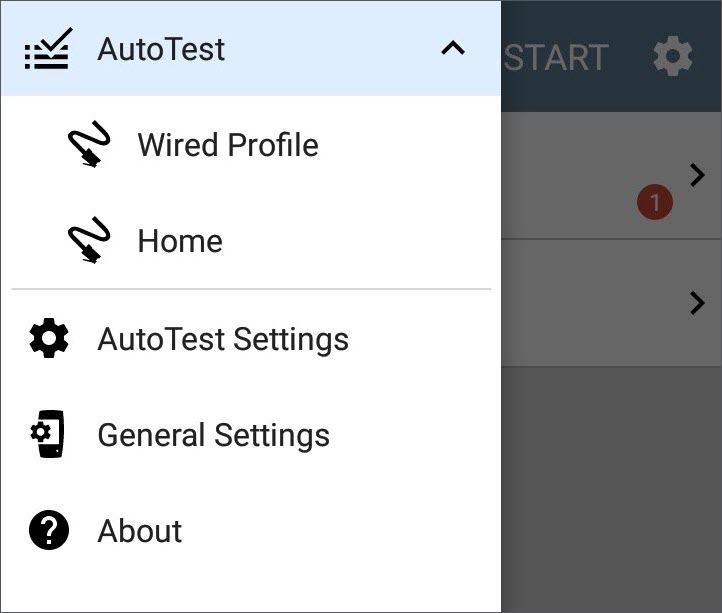
As an example, the AutoTest navigation drawer (above) provides access to the enabled AutoTest profiles, AutoTest Settings, General Settings, and the About screen.
Settings for each specific app are described in the chapter for the app.
About Screen
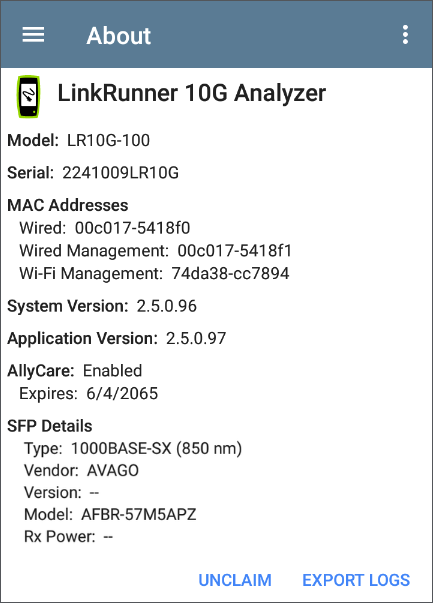
The About screen displays the model number, serial number, MAC addresses, software versions, SFP details, and current AllyCare contract status for your LinkRunner 10G.
You can enable a User-Defined MAC in the application General Settings or in the Wired Profile Settings. (User-defined) then appears next to the MAC address on the About screen and in relevant test screens.
Exporting Logs
The About screen contains the Export Logs function, which allows you to save your unit's logs for analysis by NetAlly's customer support team.
Tap the EXPORT LOGS link to download a .tgz file to the Downloads folder on your unit. Open the Files app to transfer the file using email or another method. (See Managing Files.)
Import/Export for All Apps
Tap the action overflow icon  on the About Screen to display a menu for importing or exporting of settings for all applications that allow import/export. See Import/Export Settings for details.