Managing AutoTest Profiles and Profile Groups
Profiles are a series, or suite, of tests designed to analyze the different characteristics of your networks. The LinkRunner 10G AutoTest app
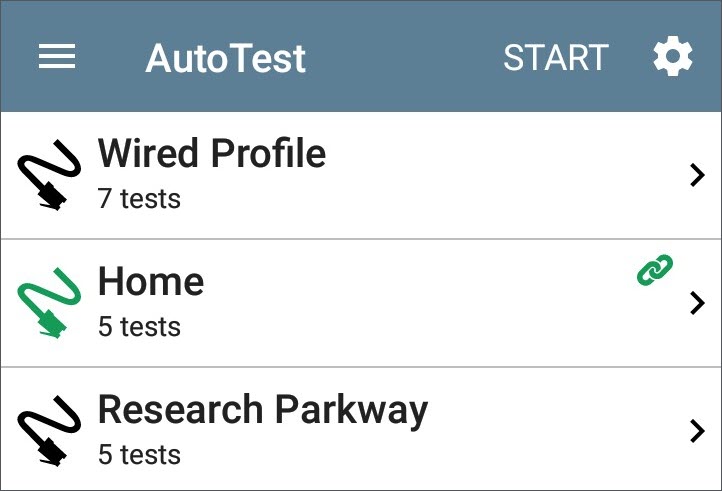
Wired Profiles to test copper and fiber connections.
In this Topic
Import/Export AutoTest Profiles
Profile Groups
LinkRunner 10G also allows you to save Profile Groups. Profile Groups are simply the included list of test Profiles and the order in which they run when you start an AutoTest. (See AutoTest Overview for more explanation of Profile Groups.) You can configure and select Profiles and Profile Groups for different locations, jobs, networks, or other purposes.
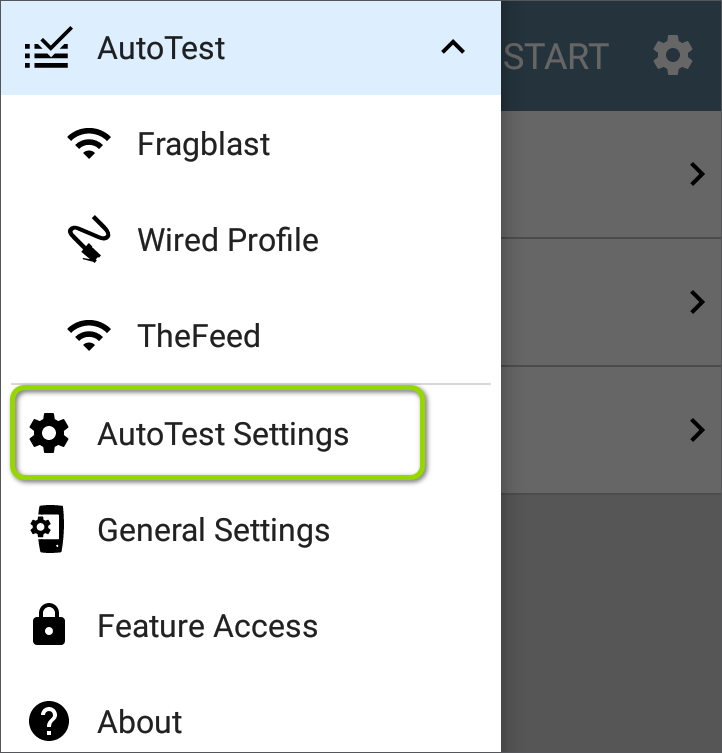
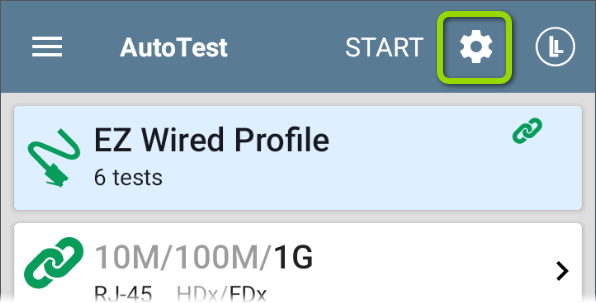
To manage your Profiles and Profile Groups, tap the Settings ![]() button on the main AutoTest screen (with the list of Profiles).
button on the main AutoTest screen (with the list of Profiles).
AutoTest Profile Group Settings
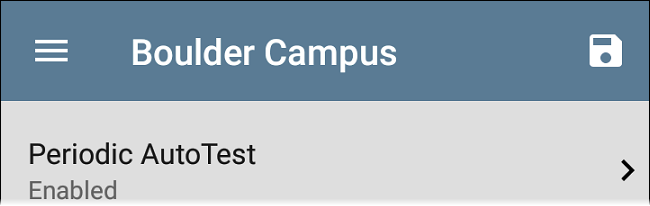
The AutoTest Settings screen contains the Periodic AutoTest and Profile Group settings. (This section covers Profile Group management. See also Periodic AutoTest Settings.)
Open the AutoTest Settings screen from the left-side navigation drawer in the AutoTest app.
Use the controls on the AutoTest Settings screen to manage your Profiles and Profile Groups.

NOTE: The example above shows a tester with both wired and Wi-Fi testing. Your available profile types depend on whether your model supports wired, wireless, or both.
You can perform the following actions on the AutoTest Settings screen:
-
Check or uncheck the boxes to include or exclude a test Profile from the currently active Profile Group.
-
Tap the up and down arrows
 to reorder the test Profiles on this and the main AutoTest screen for the Profile Group.
 -
Tap the action overflow icon
 to Duplicate or Delete a Profile.
CAUTION! When you delete a Profile, it is deleted from all Profile Groups. To remove a Profile from the current group, simply uncheck it. -
Tap any Profile's name to open the test and connection settings for the Profile.
-
Tap the save icon
 to perform the following actions:
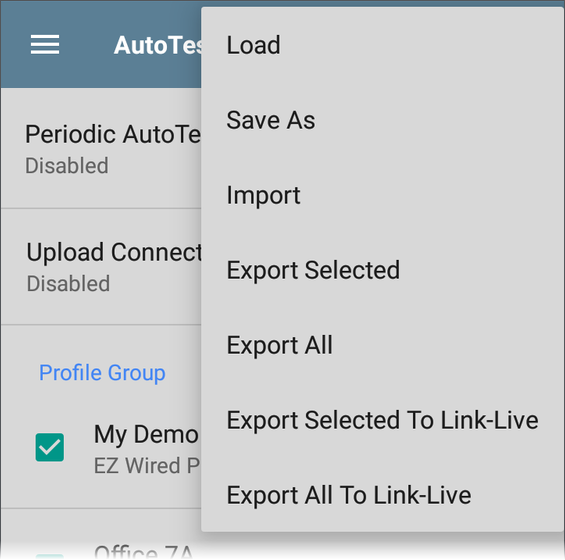
-
Load: Open a previously saved settings configuration, which includes the Profile Group.
-
Save As: Save the current settings and Profile Group with an existing name or a new custom name.
-
Import: Import a previously exported settings file.
-
Export Selected: Create an export file of the current settings for the checked profiles, and save it to internal or connected external storage.
-
Export All: Create an export file of the current settings for checked and unchecked profiles, and save it to internal or connected external storage.
-
Export Selected to Link-Live: Create an export file of the current settings for the checked profiles, and send it to Link-Live for storage and transfer to other units.
-
Export All to Link-Live: Create an export file of the current settings for checked and unchecked profiles, and send it to Link-Live for storage and transfer to other units.
See also Saving App Settings Configurations.
See Exporting and Importing App Settings for more details.
-
Each Profile Group can run one or many instances of the profile type. Saved Profiles are available across all of your Profile Groups.
Custom AutoTest Settings/Profile Group Names
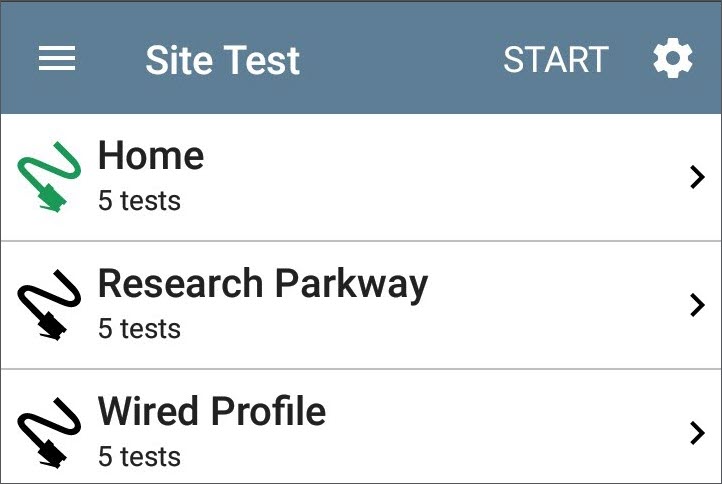
By default, the AutoTest app screen shows "AutoTest" in the header, and the AutoTest Settings screen header is "AutoTest Settings." Once you save a custom name, the name displays in the AutoTest app header and in the AutoTest Settings screen header.
In the example below, the user has saved a custom AutoTest configuration named "
The main AutoTest app screen now displays the custom name in the header.
Factory Default EZ Profiles
Your LinkRunner 10G begins with a default version of the
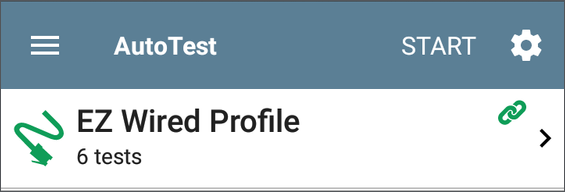
To customize an individual Profile with the required network settings, tap the settings ![]() icon on that profile's test card screen, shown below.
icon on that profile's test card screen, shown below.
By default, the EZ Wired Profile runs automatically whenever a wired link becomes active on the top RJ-45 port. If you create additional Wired Profiles, the last profile in the list automatically runs under the same conditions. However, if multiple Wired Profiles are present and the AutoTest app is currently in view, no profile will run automatically.
NOTE: The default Wired Profile does not run automatically over a fiber link. You must tap START in AutoTest to run a Wired Profile on a fiber connection.
Adding New Profiles
To add new test profiles to the current AutoTest, tap the floating action button (FAB) on the AutoTest screen.
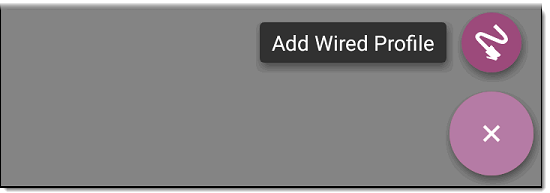
The profile's configuration screen appears. See the topic for each profile type for a description of its settings.
After you configure the profile settings, tap the back button  at the bottom of the screen to open and run the new test profile.
Creating New Profile Groups
To create a new Profile Group, follow these steps:
-
Go to the AutoTest Settings and Profile Group screen by tapping
 on the main AutoTest screen.
 -
Uncheck the boxes for any Profiles you do not want included in the new Profile Group.
-
Tap the FAB
 to add new test Profiles to be included in your new Profile Group.
 -
Tap the up and down arrows
to change the order in which the test Profiles run. Unchecked profiles automatically move to the bottom of the list once you leave and revisit this screen. -
Tap
, and select Save As. A dialog box opens, where you can enter the new name.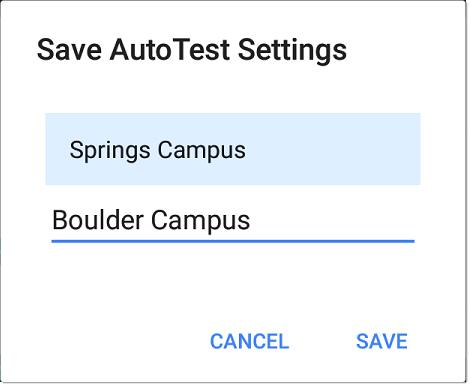
-
Enter a new Profile Group name, and tap SAVE. The LR 10G returns to the Profile Group screen with the new group name shown as the title.
Import/Export AutoTest Profiles
In addition to creating new profiles or using defaults, you can also:
-
Import and export profile settings to any connected external or internal storage. See Import/Export Settings.
-
Use the Link-Live cloud service to transfer profile settings to other devices in near-real time. See Transferring AutoTest Settings to Other Devices Using Link-Live.