Device Naming and Authorization
The Discovery app provide
Authorizations can also be assigned to a list of devices or addresses all at once. See Setting an Authorization for Multiple Devices or Addresses at Once in this topic or Security Auditing – Batch Authorization in the Main Discovery List Screen topic.
In complex cases, editing the text file that stores names and authorizations is more efficient. Names and Authorizations are saved in the internal authname.txt file and remain set as the unit powers off and on. Instructions for accessing authname.txt are at the end of this topic.
In this Topic
Address Authorization Overview
Sorting and Filtering by Authorization
Assigning a Name and/or Authorization to a Single MAC
Setting an Authorization for Multiple Devices or Addresses at Once
Changing or Clearing a User Name or Authorization
Revising or Importing authname.txt
Device Naming Overview
Custom "User Names" can be set in the Discovery app. Once set, the custom User Name is given precedence and shown in other NetAlly apps wherever device information is displayed.
You can assign a custom User Name to a discovered device from its details screen in the Discovery app by opening the floating action menu.
The name entered will be associated with only the address shown in the Name and Authorization dialog.
You cannot assign a Name to multiple addresses at once.
Address Authorization Overview
A device's Authorization status is displayed in the Discovery app. This feature allows you to quickly identify your known devices and categorize them with the following statuses:
- Authorized: For devices approved for use on your network
- Neighbor: For devices owned and controlled by neighboring organizations
- Flagged: To give visibility to a specific device
- Unknown: For devices that have not been identified or classified
- Unauthorized: For devices that should not be on the network and may present a security risk
- Unspecified: Default unassigned Authorization status
While the Authorization statuses are designed with these intended meanings, you can use them however you like for your purposes.
Authorization statuses are applied to MAC addresses or BSSIDs (if you have a device with Wi-Fi capabilities). As with the User Name, an Authorization set in the Name and Authorization dialog for a single address will be assigned to the address shown.
The associated device will take the name and authorization assigned, but the other addresses for that device will not. Any device with multiple addresses can also have multiple names.
To assign Authorization statuses to multiples addresses, navigate to the main list screen in Discovery and touch the overflow menu button  . Then, select Set Authorization.
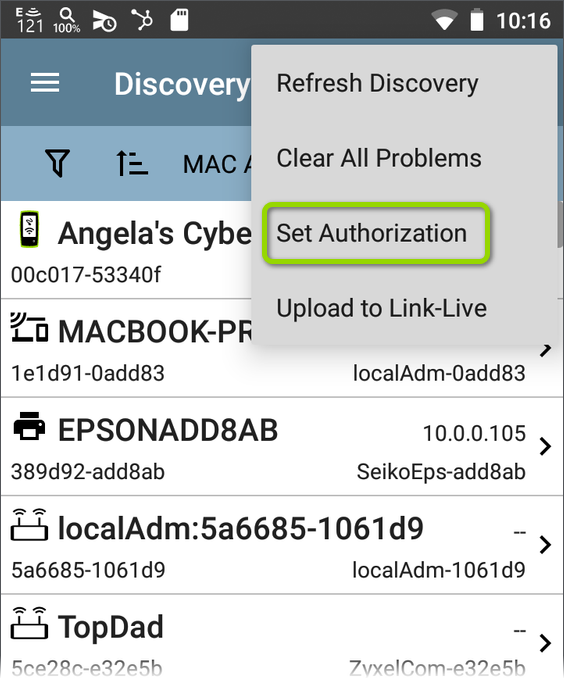
See Setting an Authorization for Multiple Devices or Addresses at Once later in this topic for detailed steps.
Sorting and Filtering by Authorization
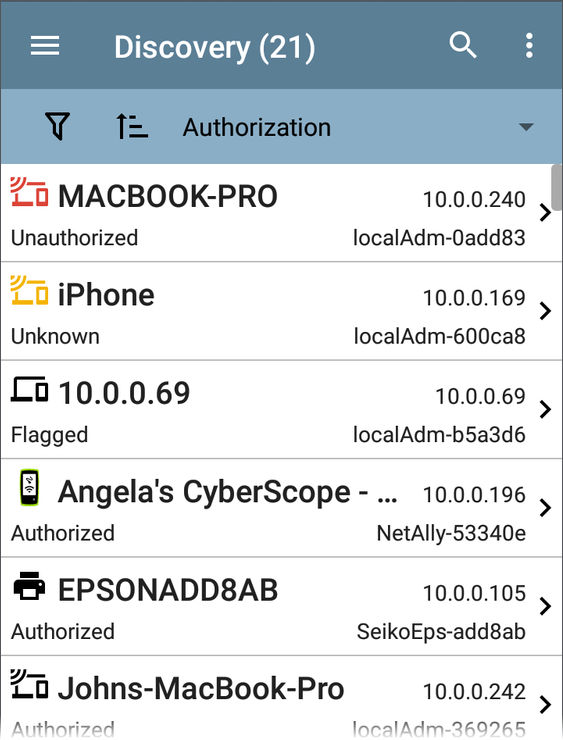
You can also sort and filter by the assigned Authorization in the Discovery app. When a list is sorted by Authorization (in normal sort order), the devices with Authorizations of highest concern appear at the top. The image below shows a list screen sorted this way:
Assigning a Name and/or Authorization to a Single MAC
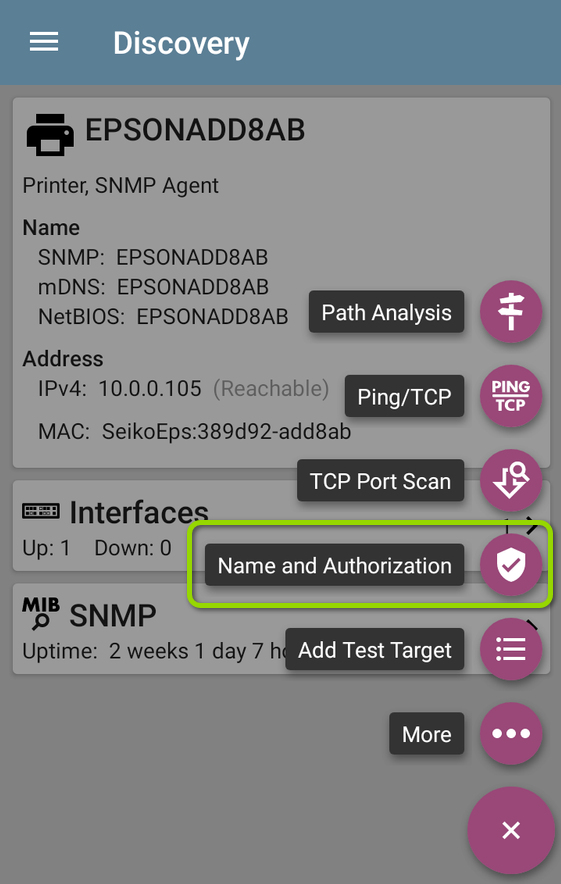
Access the Name and Authorization function from the floating action menu  on a Discovery Device Details screen.
NOTE: When applying an Authorization to a device with multiple MAC addresses in the Discovery App, the Authorization status is only applied to the MAC address displayed on the Details screen and in the Name and Authorization dialog.
-
Tap the FAB on a Discovery screen for a device with a discovered MAC.
-
Select Name and Authorization from the floating menu to open the dialog.
-
In the Name and Authorization dialog, tap the User Name field to enter a customized name, if desired. In the image above, the user has entered the name "Conference Room AP."
-
Select the radio button to assign an Authorization status as needed.
-
Tap OK to apply.
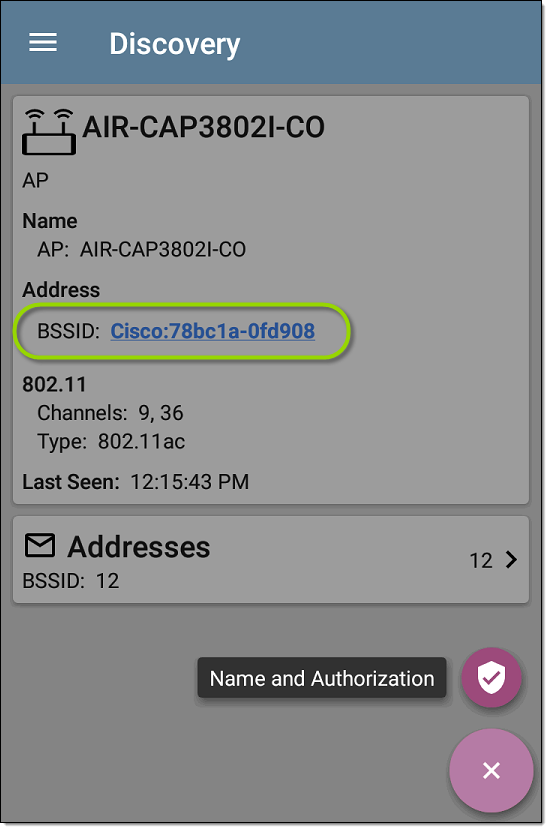
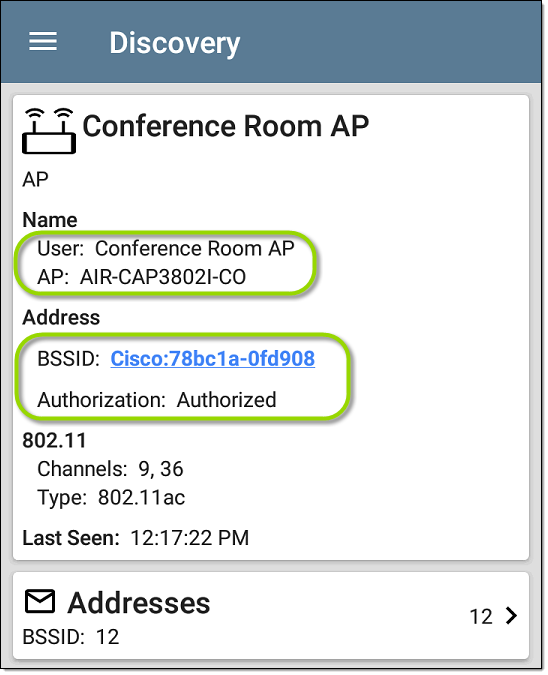
The example above shows an AP's Details screen in the Discovery app.
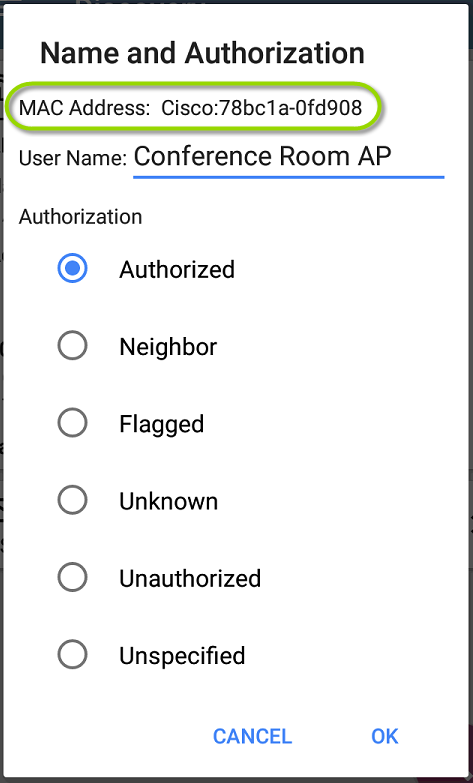
NOTE: It is possible to either enter a user name or select an Authorization. You do not have to do both.
Once applied, the User Name and Authorization are displayed on a device's Discovery Details screen.
NOTE: If different Authorization statuses are assigned for different MAC addresses on the same device, the Authorization of highest concern appears on the device's Details screens.
Setting an Authorization for Multiple Devices or Addresses at Once
From the Discovery app's list screens, you can assign authorizations to batches of MAC addresses.
-
In Discovery, navigate to the main Discovery List screen and filter for the devices you want to assign a status.
-
On the list screen, tap the action overflow icon
at the top right and select Set Authorization.
-
Select your desired Authorization status in the Set Authorization dialog:
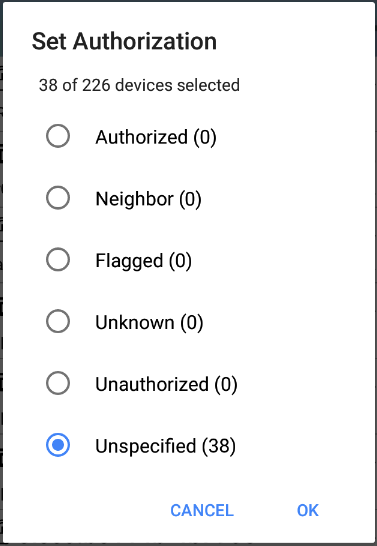
The dialog shows how these addresses are currently categorized and the number in each category.
-
Sort the list screen by Authorization to view the status of each device or address.
Changing or Clearing a User Name or Authorization
Open the Name and Authorization dialog again for the same MAC address on a device to reassign or clear the assigned User Name or Authorization.
NOTE: If the Name or Authorization do not update as expected after a few minutes, you may have assigned them to other addresses for the same device.
To view all assigned Authorizations for a device, open the Discovery screen for the device and view the Addresses screen. Then, sort by Authorization.

To reset a device's User Name and/or Authorization to the unassigned defaults, open the Name and Authorization dialog, clear the User Name field and leave it blank, and select the Unspecified Authorization. Then, tap OK.
Revising or Importing authname.txt
Custom Names and Authorizations are stored in the authname.txt file in the LR 10G's internal storage .settings folder, accessible from the Files app.
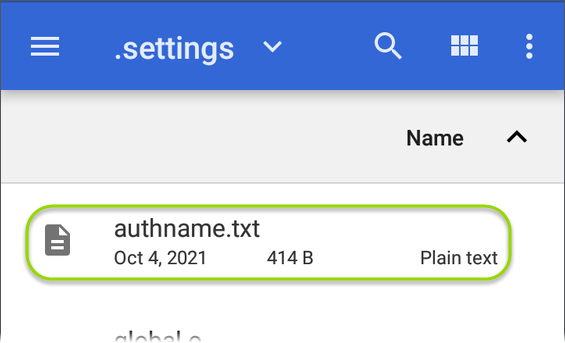
NOTE: In the Files app, you may need to tap the action overflow icon at the top right and select Show Internal Storage to navigate to the folder and sub-folders, as shown above.
If desired, you can manually edit this file on the LR 10G unit, or you can create a new authname.txt file on a PC and import it onto your unit in the same file location. (You can also push authname.txt files from Link-Live to your test unit.)
NOTE: Your LinkRunner 10G can parse ? wildcard characters in the authname.txt file (although * wildcard characters are not allowed).
The default authname.txt file on your unit contains instructions on how to format your Name and Authorization entries:
-
Each line defines one MAC in the format:
MAC, [Authorization][, Customized Name] -
Authorization is case insensitive and can be one of these strings:
- Authorized
- Neighbor
- Flagged
- Unauthorized
- Unknown
- Unspecified (or blank)
-
You can substitute a question mark ? for a MAC digit to match any value for that digit.
A sample authname file could look like this:
00c017-330ea3, Authorized, iPerf3-server
bc:e9:2f:41:df:b4, Authorized, HP-Deskjet
b827eb-??????, Unauthorized, Raspberry-PI
7c:10:c9:??:??:??, Neighbor, ASUS-AP
To edit the authname.txt file on the LR 10G, third-party apps, such QuickEdit Text Editor, are available from the NetAlly App Store  .
.
For help importing a file, see the Managing Files topic.
NOTE: After importing and overriding the authname.txt file, we recommend Refreshing Discovery in the Discovery app or restarting your unit.