Enterprise security requirements for WPA/WPA2 Enterprise now require a CA (Certificate Authority) certificate file to be imported to your unit. Some EAP types also require a client certificate and key. The example below assumes you are using MSCHAPV2.
Before You Begin
You may depend on your IT department to provide authorization certificates, which may be created by a Trusted Root Authority like VeriSign or DigiCert. If so, contact your IT department for the certificate resources. You will need:
-
CA certificate in .pem format
-
Clients:certificates in “. p12” format with private key (EAP TLS only)
-
Common name, domain name, username, and password for the server to which you want to connect.
If you have the ability to generate your own self signed certificates, such as a FreeRADIUS server, you can create these resources as needed. This procedure uses examples generated by a FreeRADIUS server as a certificate source, although other sources are available.
Once you have the certificate, continue with the following:
-
Copy the self-signed Certificate Authority (CA) file (in .pem format) onto a USB thumb drive.
-
Transfer the USB thumb drive to your AirCheck G3, and then copy the .pem file to the Downloads folder.
-
Open the Settings app.
-
Navigate to Security > Encryption & credentials > Install a certificate > Wi-Fi certificate. This opens the file picker.
-
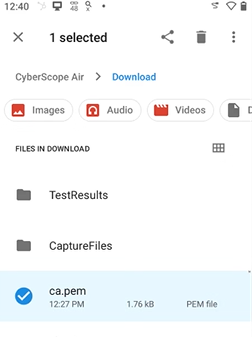
Navigate to the Downloads folder and select the .pem file that holds your CA certificate.
- <p class=”Paragraph SCXW167838455 BCX8″ style=”margin: 0; padding: 0; user-select: text; word-wrap: break-word; white-space: pre-wrap; font-weight: normal; font-style: normal; vertical-align: baseline;