To connect to a hidden WiFi network on an AirCheck G3 & CyberScope Air, you need to add the network manually and ensure the “Hidden Network” setting is enabled. This involves navigating to your device’s Wi-Fi settings, adding a new network, and specifying the SSID, security type, and password, then activating the advanced “Hidden Network” option.
Here’s a step-by-step guide:
Open Settings: Navigate to your device’s Settings app.
Go to Network & Internet: Find and tap on “Network & Internet” (or a similar option, it may be under Connections).
Select Wi-Fi: Tap on “Wi-Fi”.
Add a New Network: Tap the “+” or “Add network” option at the bottom of the list.
Enter Network Details:
Enter the SSID (Network name).
Enter the security type and password for the network.
Enter the SSID (Network name).
Enter the security type and password for the network.
Advanced Options:
Tap “Advanced” or “Advanced options“.
Locate the “Hidden network” setting and ensure it is set to “Yes“.
Tap “Advanced” or “Advanced options“.
Locate the “Hidden network” setting and ensure it is set to “Yes“.
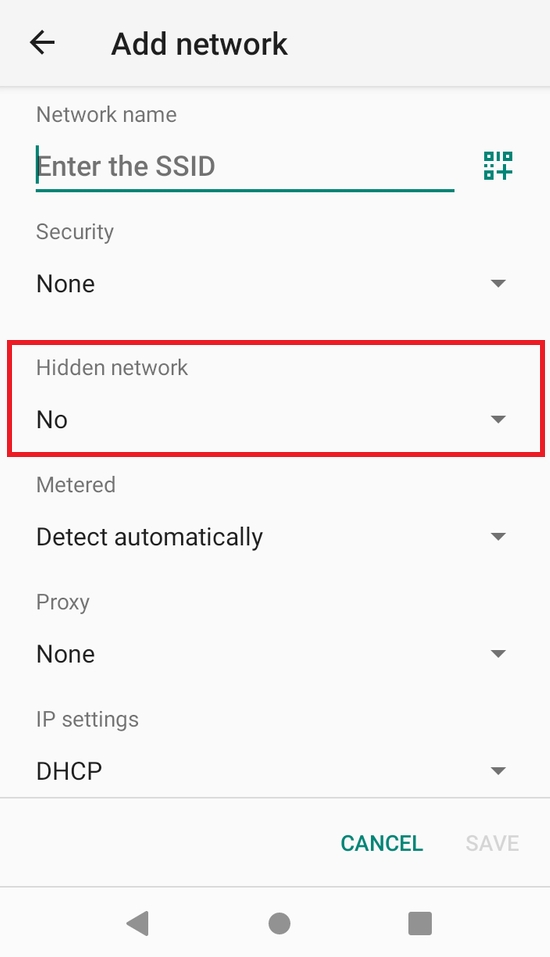
Save: Tap “Save” to add the network.
Connect: Your device should now be able to connect to the hidden network when it’s available.
Note: Going back into the added network did not provide the option for the hidden network. The option only appeared on the initial setup.