How to Take a Screenshot
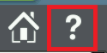
To take a screenshot, press and hold the question mark Help icon in the upper right corner for 3 seconds. You can take a screenshot in any screen that has the Help icon.
When the screenshot is successful a camera icon appears and the tester beeps.
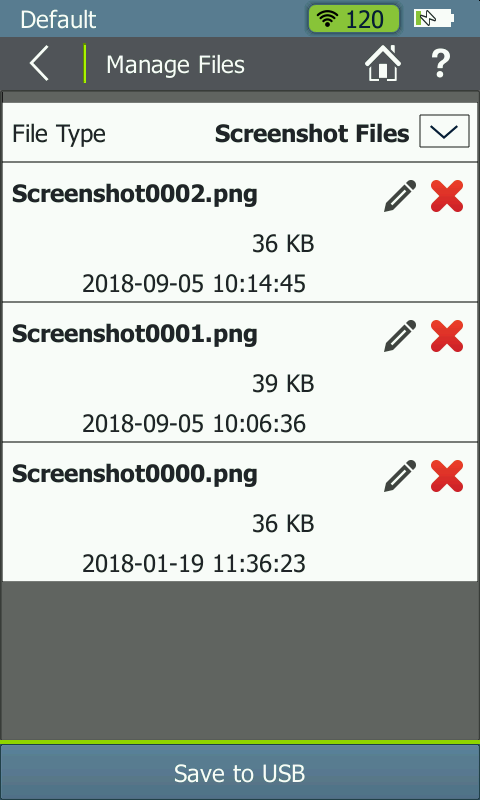
How to Manage Screenshots
Go to Settings > Manage Files > In upper right corner touch the drop-down arrow to the right of “Session Files” to see more choices. Select Screenshot Files.
- Click on the pencil Edit icon and rename the file using the keyboard that will appear. There is a 16-character limit to the screenshot file name. When you click Done, the name change is saved.
- To save externally, insert a flash drive and click Save to USB. The flash drive must be formatted FAT32. All screenshots in the tester will be saved to a folder.